The Koko Head Crater hike was just one of the many hikes I did on my visit in late August 2023, but it was by far the craziest! I’d aimed to pack my week-long Oahu itinerary with interesting hikes, especially those with a slant towards World War II history, and this one checked all those awesome boxes. The Koko Head railway hike sounded super difficult, pretty dangerous, and downright miserable… so I couldn’t wait to do it!
This post introduces you to the truth about hiking Oahu’s wildest hike—the Koko Head Crater hike. It includes everything you need to know to conquer this awesome trail, safety information, tips for success, and all the honest details the other sites leave out. (Including how difficult it actually is.) Consider this your Koko Head Crater hike survival guide.
The Koko Head Crater hike is part of my Oahu bucket list. Get the whole thing here:
What is the Koko Head Crater Hike?
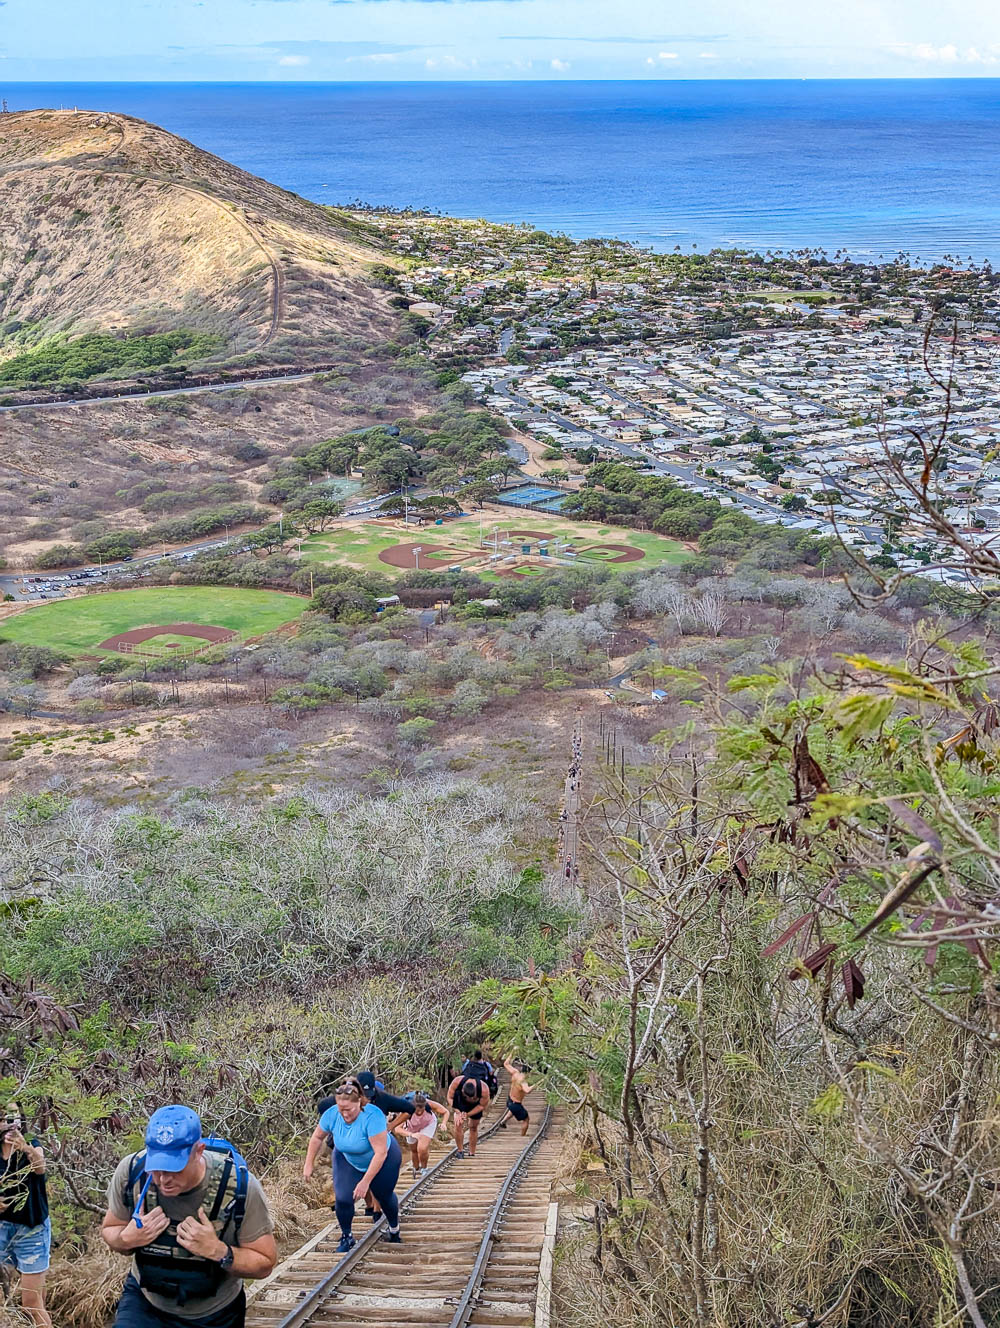
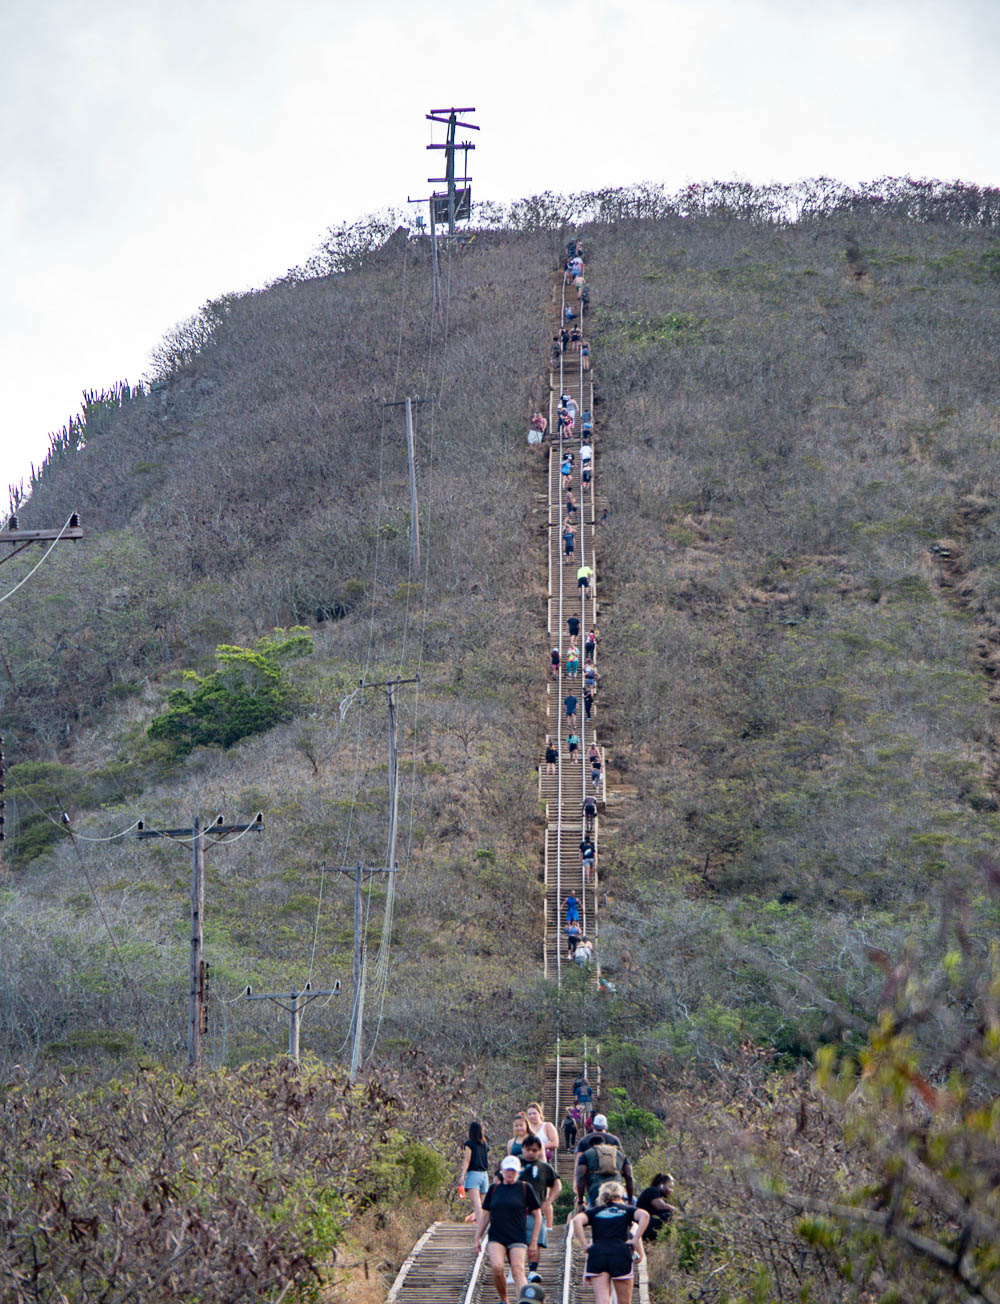
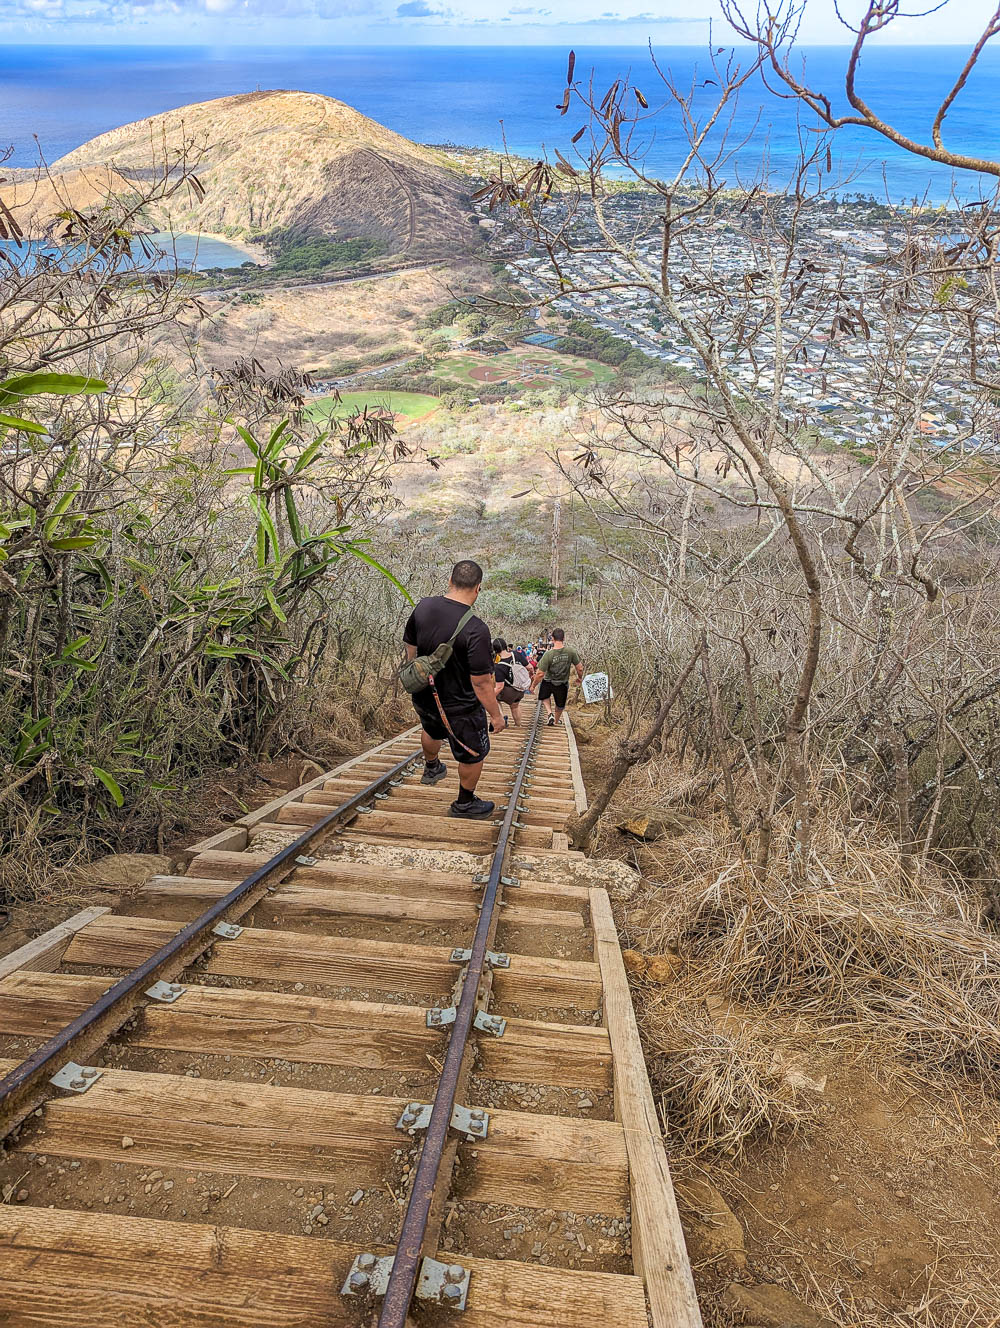
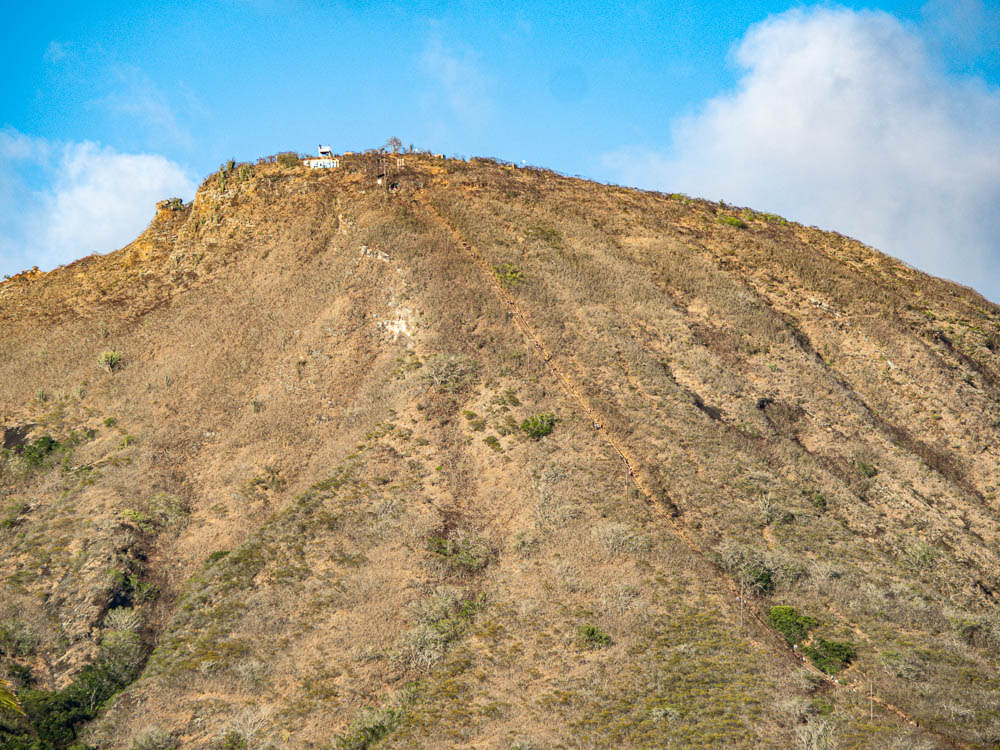
The Koko Head Crater Hike is an out and back hike that follows an abandoned railway up the side of the Koko Head Crater. These abandoned railroad ties are now known as the “Koko Head Stairs.” There are over 1,000 of them. I warned you this hike was nuts! (This is why it’s sometimes called “Nature’s StairMaster.”)
The Koko Head railway trail is super steep and incredibly challenging to the average visitor, but will reward you with incredible 360° views if/when you reach the top. It’s “Type 2 Fun” at its finest.
History of the Koko Crater railway stairs
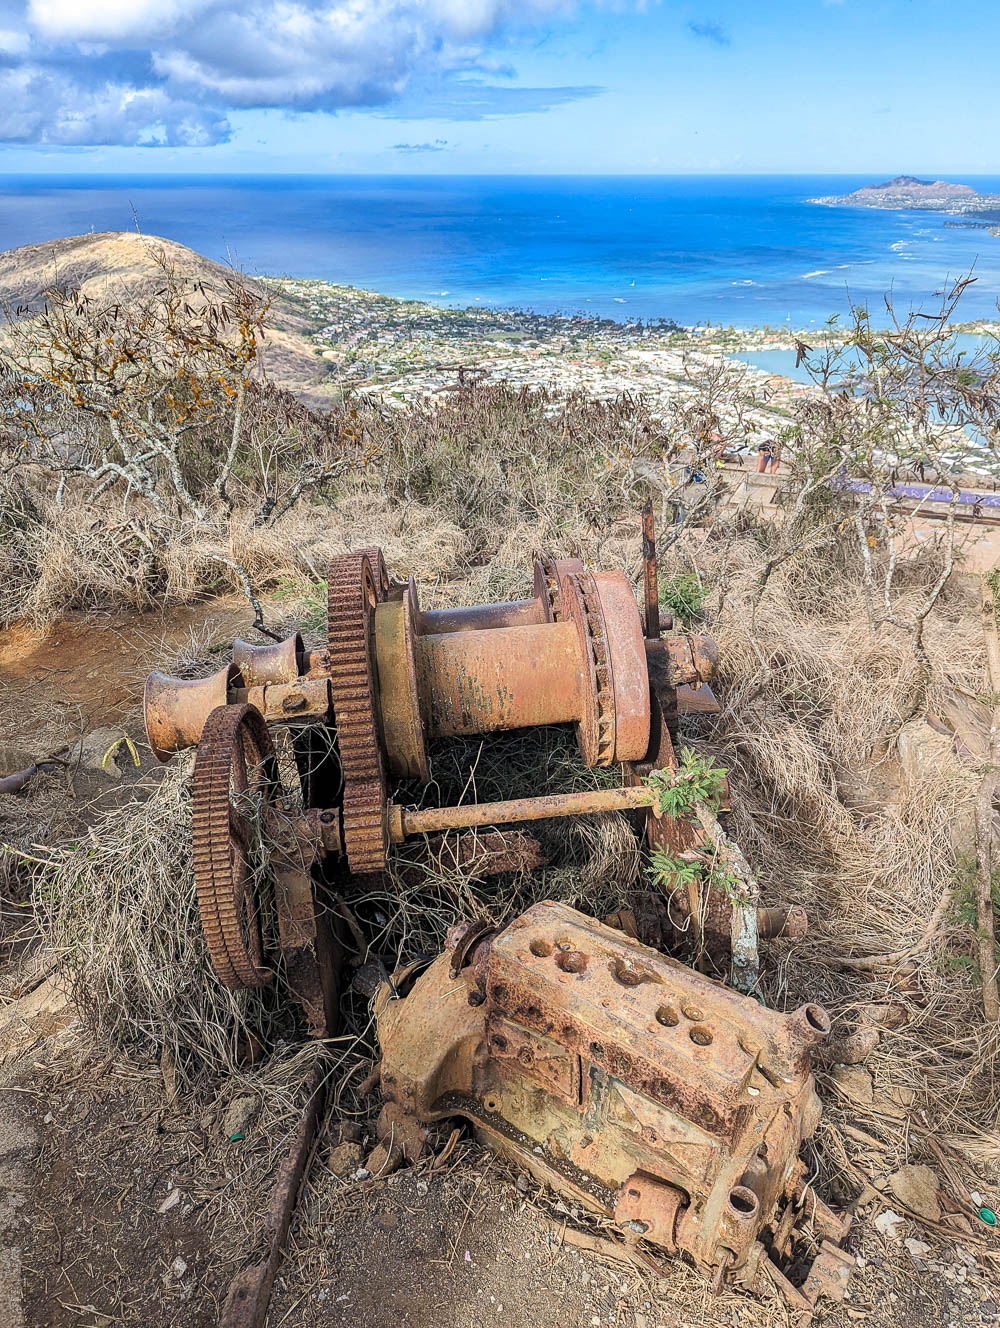
The Koko Head Tramway was built during World War II by the U.S. Army. They used a gasoline-powered winch to transport equipment, supplies, and people up and down the crater from the base to the defense installations at the top.
After the war, the radar installations at the summit were taken over by the U.S. Air Force and Hawaii Air National Guard. As part of the Hawaiian Air Defense Control Center, they assisted in tracking aircraft around the island. Eventually, their technology became obsolete and the Koko Head defense installations were no longer needed. The radar station was deactivated in 1966, the land and facilities were transferred to the City of Honolulu, and the railway of the Koko Head Tram was abandoned.
Where is the Koko Head Crater hike
Koko Head Crater is located on the far southeastern tip of the island of Oahu, Hawaii. The surrounding land and the trailhead for the Koko Head railway hike is part of the greater Koko Head District Park in Honolulu. (See map below for a visual.)
How to get to Koko Head Crater
To get to Koko Head Crater, it’s about a…
- 20-minute drive from Waikiki
- 35-minute drive from Pearl Harbor
- 35-minute drive from Kailua
- 50-minute drive from Ko’Olina
- 1-hour drive from the North Shore
You should be able to just put “Koko Head Trailhead Parking Lot” into your GPS (if you use Google Maps or Waze). If not, you can put in this address:
- Koko Head District Park: 423 Kaumakani St., Honolulu – Keep driving past the little building on your right and you’ll come to the small parking lot on your left, just past the tennis courts.
Where to park for the Koko Head Crater hike
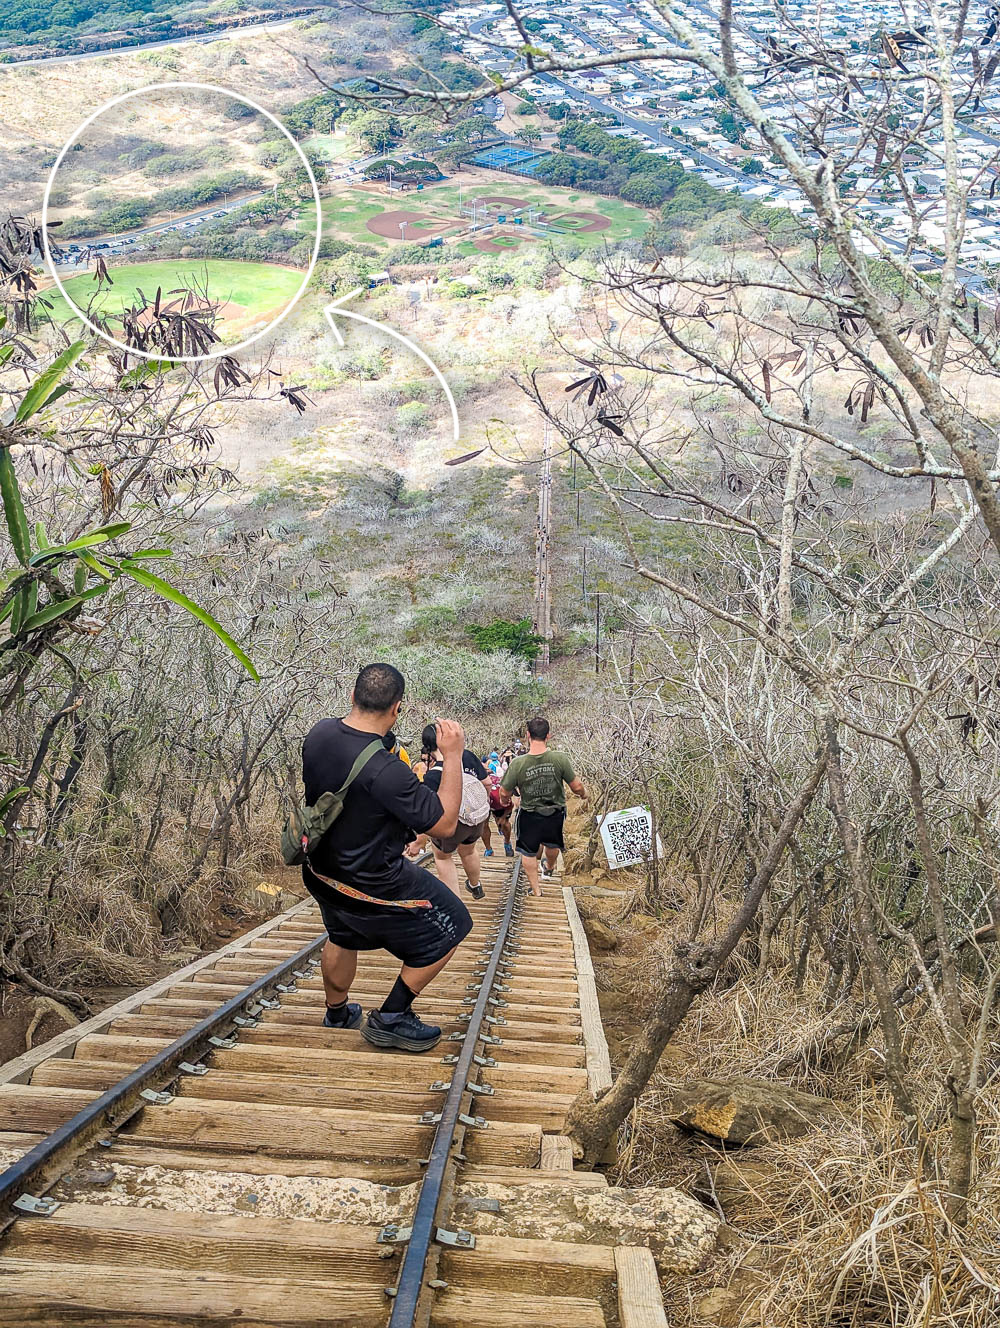
There are two FREE parking lots inside Koko Head District Park that are just a short walk from the trailhead. One of them (the smaller one) is directly in front of the restrooms and the other (the big one) is just a little ways past that.
Once inside Koko Head District Park, it’ll be easy to wind your way through the park until you come to a couple of parking lots. You’ll come to the smaller one first (43 spaces, including 4 accessible parking spots). Continue up the road and you’ll come to the big parking lot (121 spaces including 6 accessible parking spots).
To park as close to the trailhead as possible (your legs will thank you!), park as far down in the big parking lot as you can. Drive until you reach the end of the big parking lot, turn left into it there, and work your way backwards. To park next to the restrooms (your bladder will thank you!), park in the small parking lot.
How to find the Koko Head trailhead
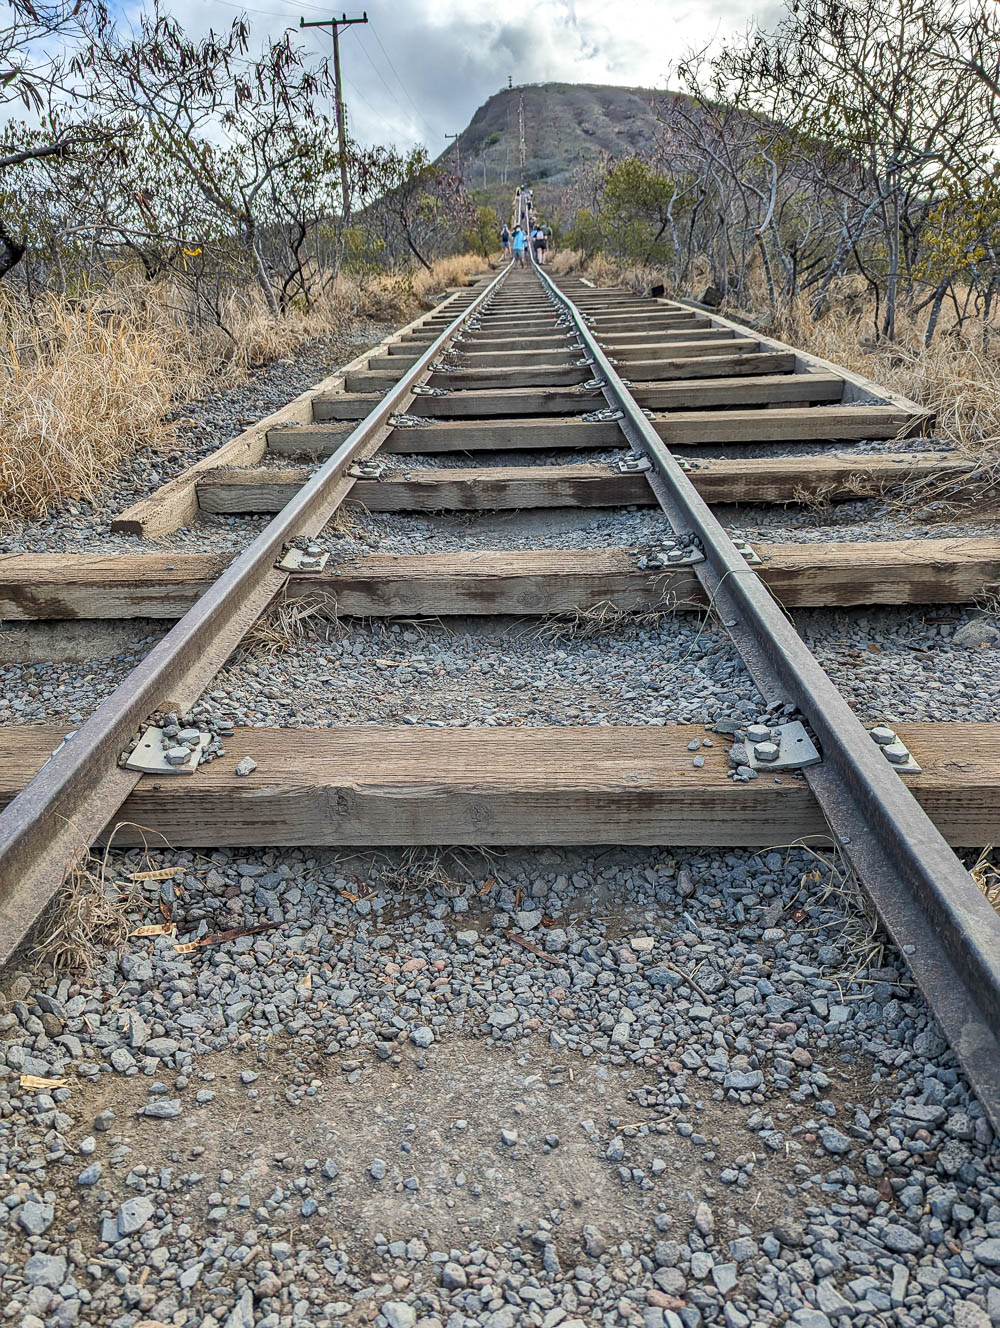
After you park, it shouldn’t be hard at all to find the Koko Head Crater hike trailhead. For me, I just followed the directions to the actual trailhead marked on my Google Map. But really, the only thing you need to know here is that there will be a ton of people going to the same place as you. So really, just follow all the people. Otherwise, here are some walking directions:
From the big parking lot
From the big parking lot, follow the paved sidewalk that starts next to the line of accessible spaces. There will be a baseball field on your left. Follow that just a short ways until you see it branch off into a dirt path that leads up a small hill; take that dirt path.
The dirt path will quickly meet up with a paved-ish road (officially known as “Koko Head Park Rd”). Turn left here and follow the paved road in the direction of the tall volcano-looking mountain. The closer you get, the more you’ll question your life choices. Just saying.
When you get to an area with a short stone wall on your left, at the end of it, veer right up the wide dirt path. Follow that a little bit until you get to the trailhead—and you’ll know it when you see it! It’s just a super steep railway that starts in the dirt.
From the small parking lot
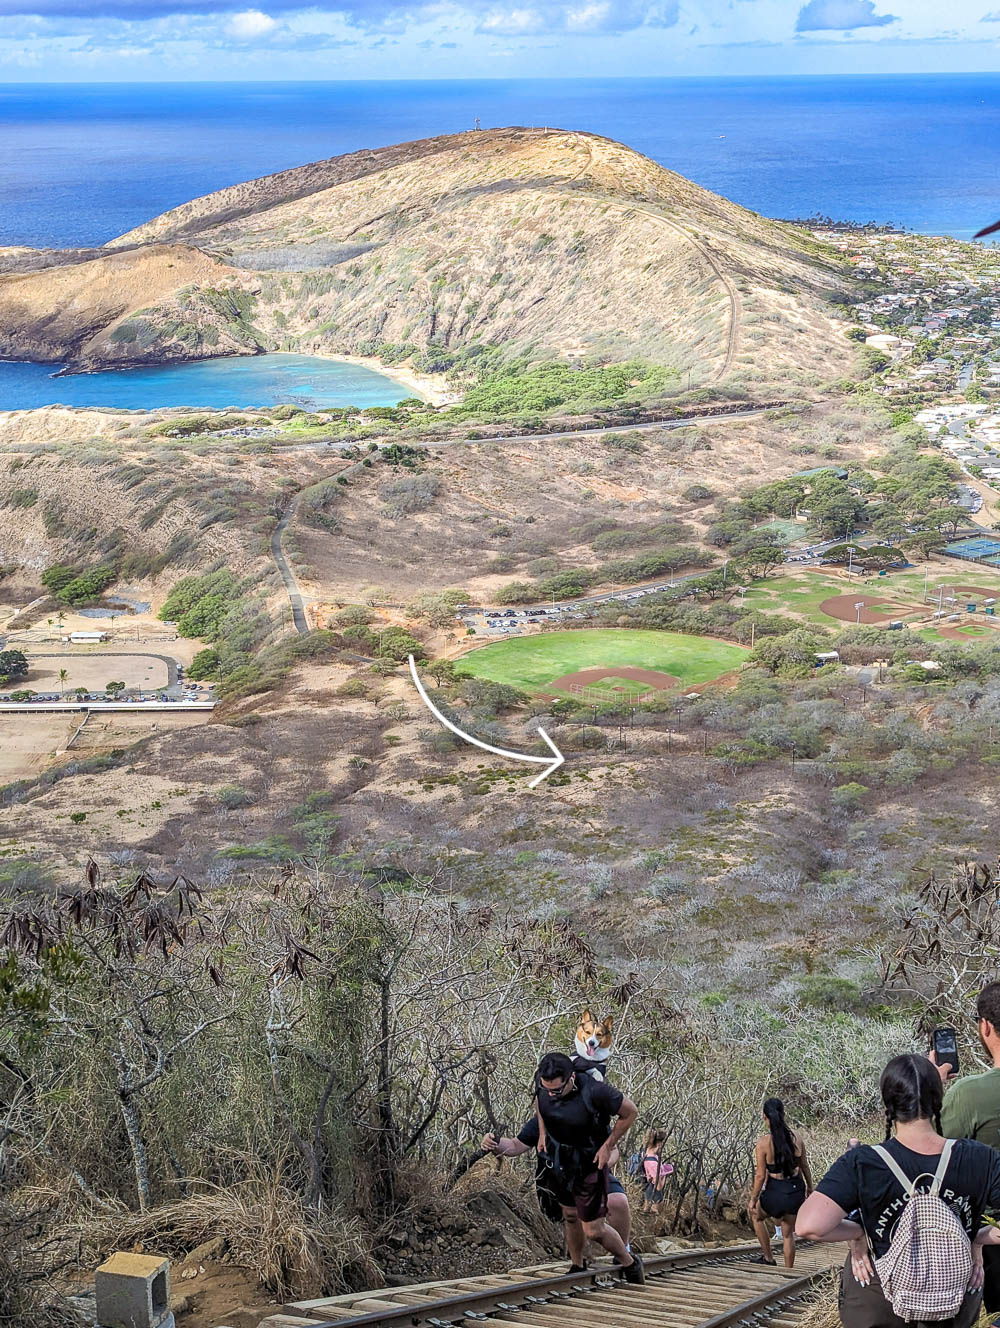
From the small parking lot, continue up the road you came in on. Walk to the end of the big parking lot and follow the directions above. Now let’s get hiking!
Koko Head Crater hike map
This map contains the most important sites you need to know for your Koko Head Crater hike: where to park, where to pee, the trailhead, and where to get beer afterwards.
To save this map: Click on the star ⭑ next to the map’s title to save in your Google Maps. To use this map: When you get there, open Google Maps on your phone, click “Saved” at the bottom, then click “Maps.”

Koko Head Crater hike at a glance
Before we get into all the sweaty, intimidating, exhausting details, here’s a brief summary of what you can expect on the Koko Head Crater hike:
- Distance: 1.6 miles roundtrip
- Average time: About 2 hours roundtrip
- Elevation gain: Between 900 and 1,000 feet (depending on the source)
- Degree of incline: Varies, but expect inclines between 27 and 50 degrees – That’s pretty much vertical in my book.
- Route type: Out and back (or in this case, up and down)
- Terrain: loose dirt, wooden steps, lots of obstacles and tripping hazards
- Conditions: Fully exposed, hot, super crowded (Having fun yet?)
- Difficulty: Easy to challenging, it really depends. Read on!
Disclaimer
Before we get into the nitty gritty of the Koko Head Crater trail, I want to remind you that you hike at your own risk! Every hike (especially in Hawaii) comes with inherent risks, and this one is no different. In fact, this one might even top the list. For real though, there are so many air rescues from this hike. Don’t become a statistic!
When attempting a new and challenging hike:
- Never hike beyond your ability
- Never hike against the advice of a medical professional
- Know your physical and mental limitations
- Don’t be afraid to stop / don’t push yourself to finish if you know you should quit
- Always consult a physician before attempting any kind of physical challenge
- Always follow all official rules and guidelines of the trail you’re hiking
The information I give in this post is a product of my own personal experience and not to be construed as any type of medical advice. My physical abilities are probably different from yours (for better or for worse). Always interpret and apply this kind of information with your specific abilities in mind. Happy hiking!
The grueling Koko Head Crater hike did not make my list of worst travel moments in 2023… but my surfing injuries did!
Is the Koko Head Crater hike legal?
Yes. Unlike the well-known “Stairway to Heaven,” hiking the Koko Head Crater railway is not against the law. While the City of Honolulu doesn’t exactly encourage you to do this hike, it doesn’t outright prohibit it either.
The City has tried to shut it down over the years, but the people of Oahu have fought long and hard to keep it open. (Because it’s, quite literally, their gym!)
Pro tip: For everything else you want to do here on Oahu, check out the Oahu GoCity Pass – a deeply discounted sightseeing pass that can save you tons of money!
Who maintains the Koko Head Crater railway?
For many decades, the City of Honolulu let the railway fall into disrepair. They didn’t stop people from hiking it, but they did nothing in terms of upgrades or removal either.
That is, until 2021 when they partnered up with Kokonut Koalition, a non-profit organization dedicated to preserving the Koko Crater stairs. With the help of community volunteers, the dangerously eroded stairs were repaired. (And since then, air rescues from the trail have been cut in half!)
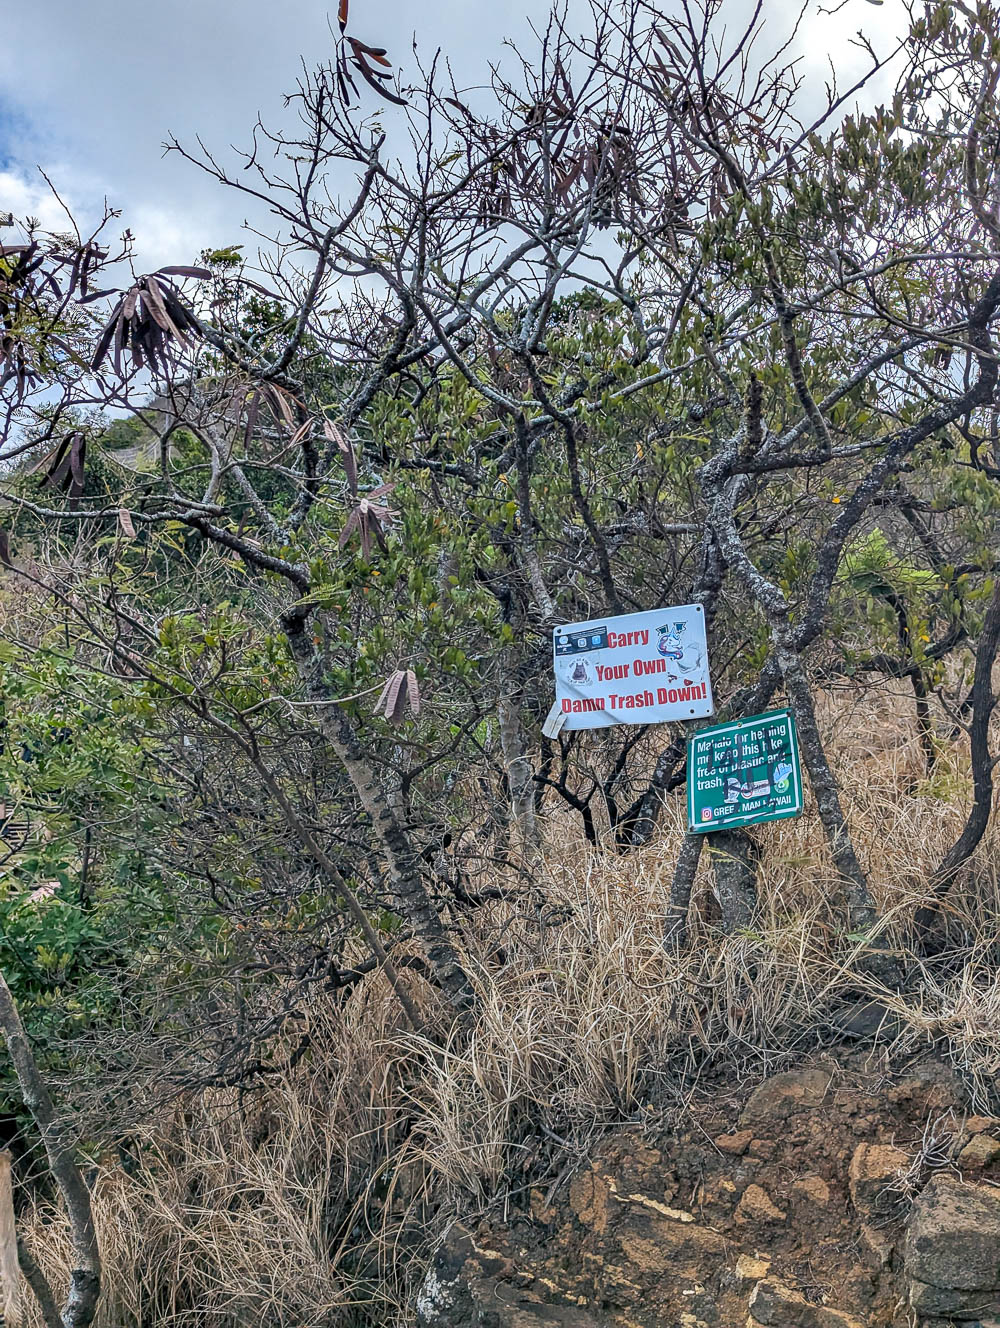
The Koalition continues to lead ongoing maintenance and upkeep of the Koko Head Crater hike. They also host “Trail Days” where volunteers can sign up for a variety of tasks needed to help rebuild the trail. Beyond that, you’ll regularly see hikers taking trash down from the top and cleaning up the area. (Always take out whatever you bring in!)
In July 2023 (right before my visit), the Honolulu Department of Parks and Recreation replaced the WWII-era structure at the top with a new (much safer) steel viewing platform.
Koko Crater railway trail length (distance)
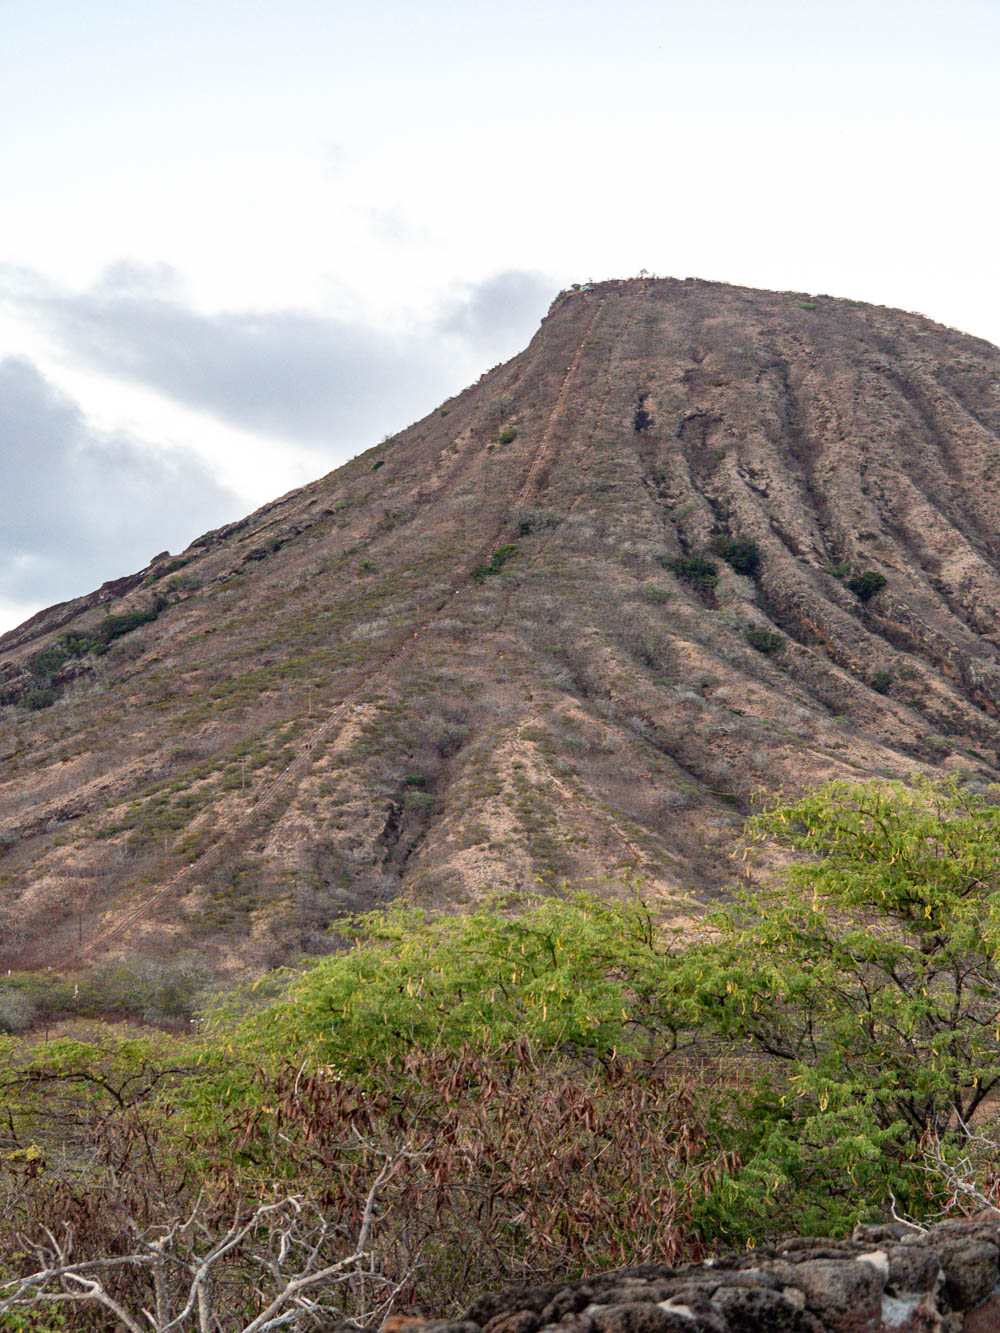
The Koko Head railway hike is about 1.5 miles roundtrip. (Different sources put it at 1.35 to 1.6 miles, so I’m just going to average it out here.) This is from the start of the railway, up the mountain, and back to the starting point. All vertical.
The walk from the big parking lot to the trailhead is another 0.6 miles each way. But that’s relatively flat, praise Jesus.
Fun Fact: The original Hawaiian name of the Koko Crater is Kohelepelepe which stands for Vagina Labia Minor. As the story goes, Pele (goddess of fire) was attacked by Kamapua’a (shapeshifting man with a pig’s head). To save her, Pele’s sister attempted to lure the man away by throwing her vagina over to the island of Oahu. The plan worked, but her, ahem, vagina left a deep indentation when it landed, creating the Koko Crater. I shit you not. (I have so many questions.)
Koko Crater railway trail length (time)
The average time to finish the Koko Head Crater hike is about two hours. BUT, this will vary wildly depending on each individual hiker.
Before starting this hike, I’d read that it takes about two hours. When I got here and looked up at the trail, I thought, “No freaking way can I do this in two hours.” I had all day, so I planned to just take my time and not worry about it.
Here’s how my hike looked, time-wise
I actually took this hike super slow. I took my time with each step and took breaks about every ten wooden beams, literally. It’s necessary; you’ll see.
At the top, I took my time resting, taking photos, checking out all the leftover WWII equipment, checking out the views on all sides, and just generally taking it easy. I ate a Clif Bar.
The way down was just as slow. Even though the downhill portion of any hike is generally much faster, such is not the case on the Koko Head railway trail. This hike is steep and you really have to force yourself to go slow lest gravity take you down much, much faster. Honestly, going down is just as slow as going up.
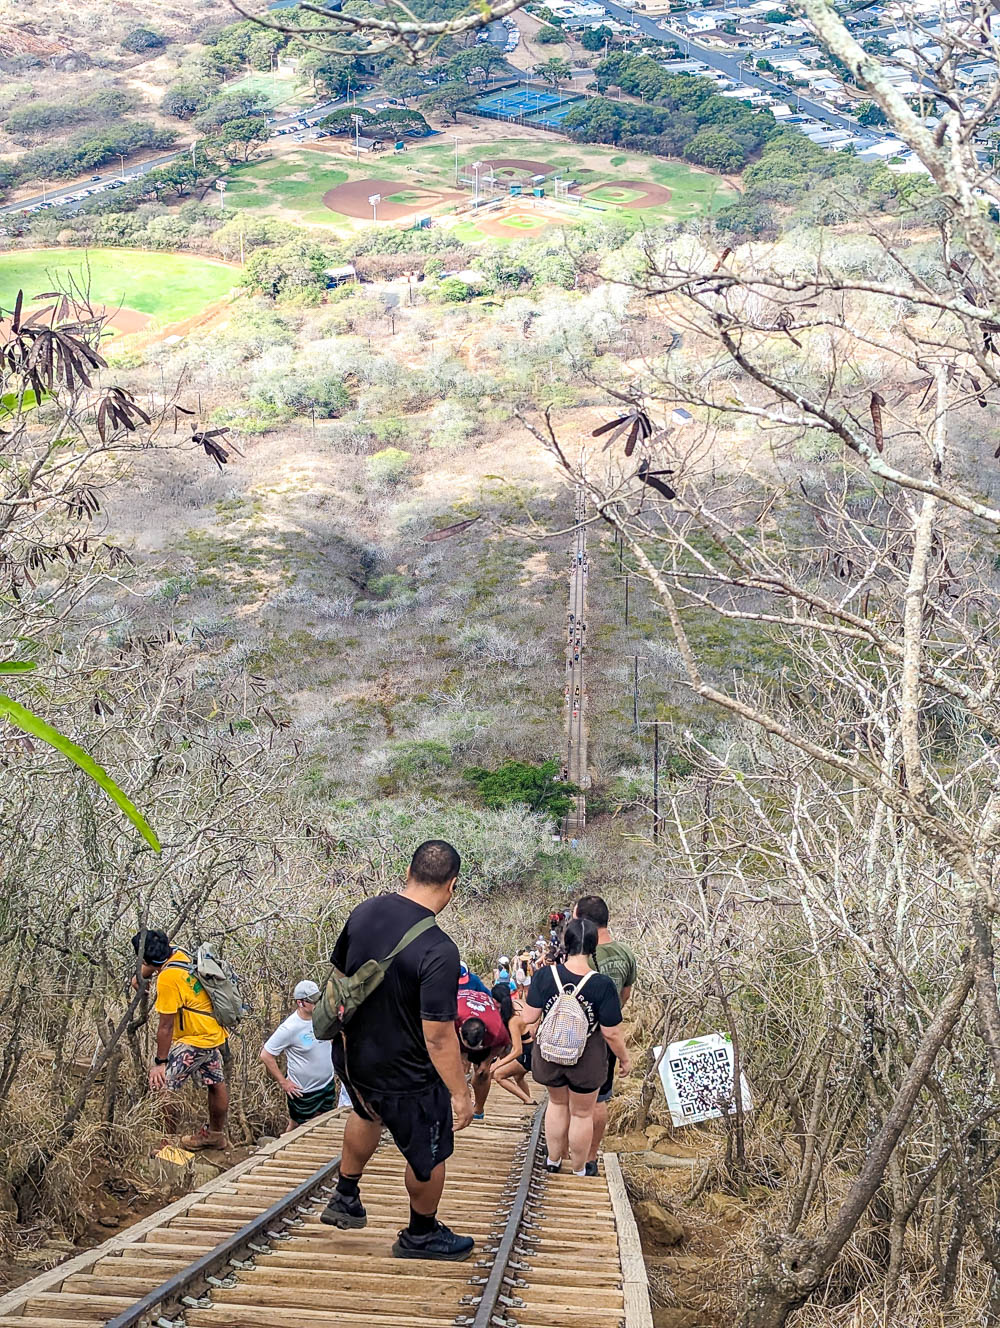
At the bottom, I checked my time and saw it’d taken me almost exactly two hours to do the roundtrip Koko Head Crater hike. I was shocked actually. Let’s just say it felt more like 4 hours. (I totally would’ve thought I calculated wrong but I started and ended at the same time as another couple and they corroborated the time. And I just checked my photo timestamps again.)
I tell you this to show that I did this hike about as slow as I could and it still only took me two hours. That being said, there were all kinds of hikers on this trail. I saw numerous people literally running both up and down the mountain. I also saw people who looked like they were knocking on death’s door who were moving about 3 feet per minute.
How long the Koko Head hike will take you
So you see, the Koko Head hike could take you any amount of time; it really just depends on your ability and/or how big of a death wish you have. Regardless, definitely leave plenty of time to do this hike. The faster you attempt this hike, the more difficult and dangerous it’s going to be.
Koko Head Crater hike difficulty
How difficult the Koko Head Crater hike is is hard to answer simply. This is why some sites list it as “Easy” and others list it as “Difficult.” I’m listing it as “Both, see explanation.”
For some people it’s no sweat at all. For others, it’s Everest. It also depends on which aspects of the hike you’re talking about. Personally, I would call it technically easy, but physically difficult. Here’s what I mean:
In terms of how technical this hike is, it’s super easy. There’s really nothing “technical” about this hike. It’s literally just walking up steps, walking down steps. While you obviously need certain abilities to even do this, this hike doesn’t require years of experience or special training to complete. If you can walk up and down stairs, you can do to the Koko Crater hike.
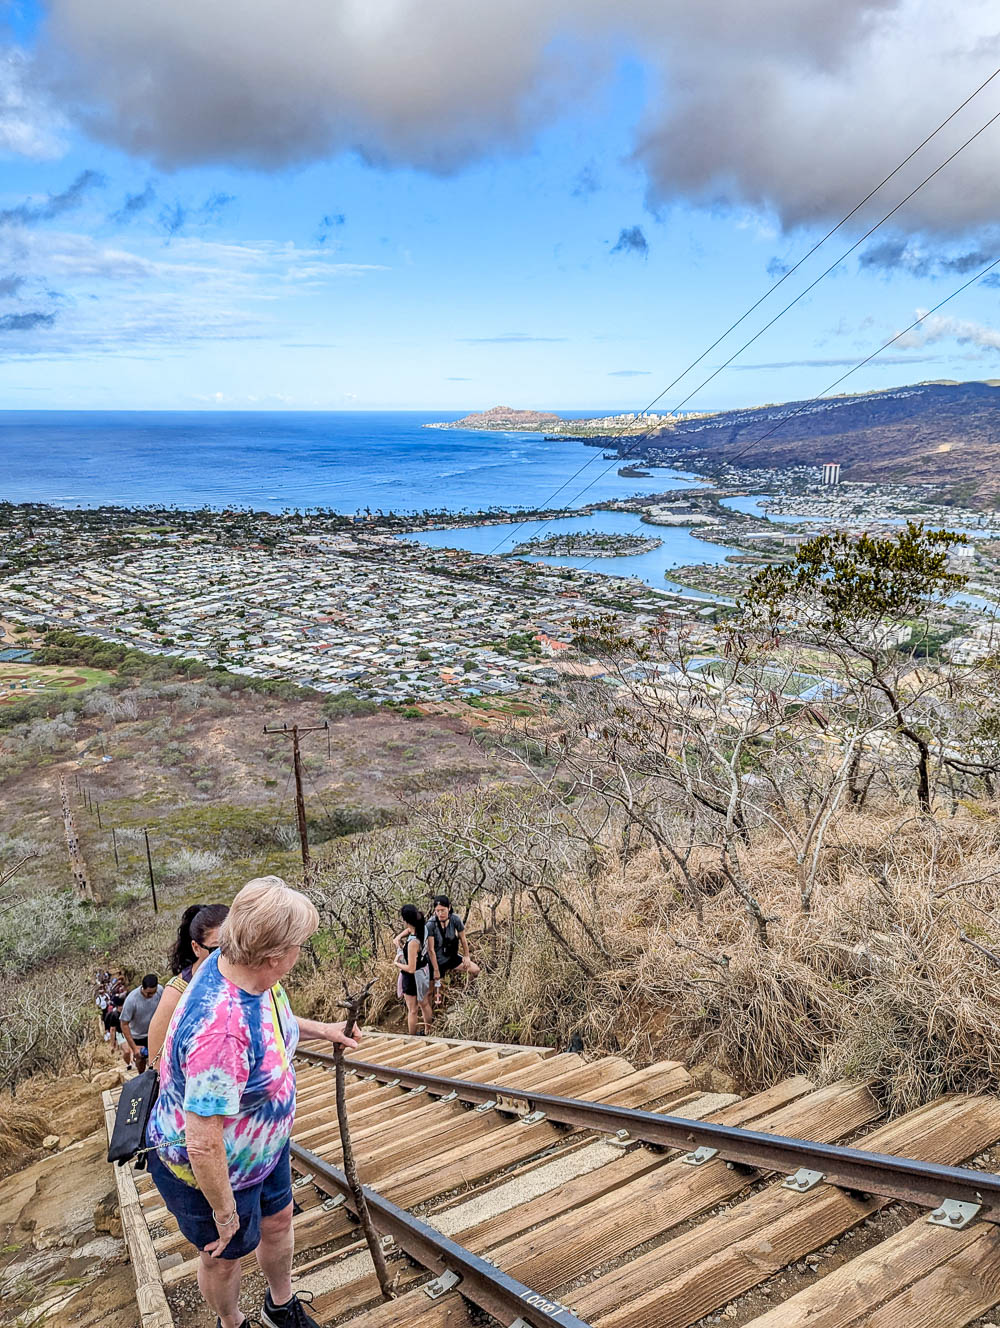
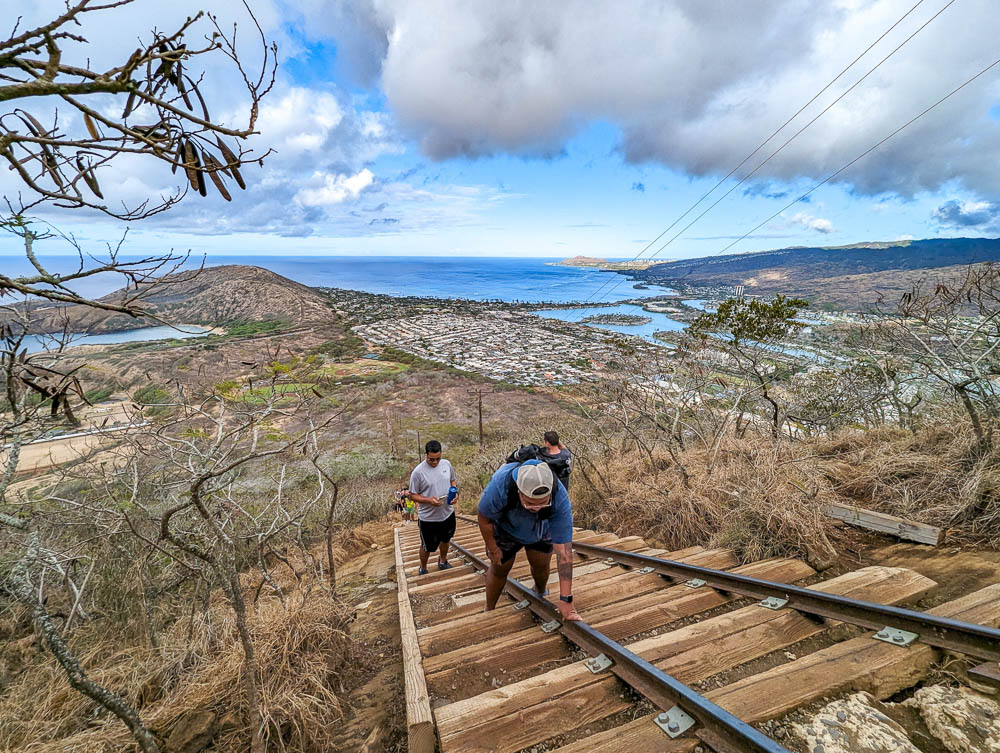
In terms of how physically demanding this hike is, it’s pretty difficult. True, you’re only climbing up and down steps, but these steps are spaced a few feet apart, are on an incredibly steep incline, and number over 1,000. And you’ll be hiking this railway in the full blazing Pacific sun. Even if you’re relatively physically fit, the Koko Head trail is still going to be a slog.
Your speed matters
Additionally, how fast you attempt the Koko Head hike greatly determines its difficulty. Essentially, you’re just climbing stairs. If you attempt to do this quickly, it’s going to be much harder. If you take it slow and easy, you won’t suffer as much. Again, leave yourself plenty of time to do this hike!
For something a bit less demanding but still challenging and rewarding, check out my guide to the Lanikai Pillbox hike, another of Oahu’s most popular hikes.
Koko Crater Elevation
The elevation of Koko Crater is 1,207 feet above sea level. The elevation gained on the Koko Crater hike is somewhere between 900-1,000 feet. That may be small potatoes when it comes to hiking, but keep in mind that you gain that in less than one mile. Ergo, the Koko Head Crater hike is, ahem, steep AF.
Koko Head hike incline
It’s not so much the altitude or the elevation gain that makes this hike challenging; it’s the degree of slope. The Koko Head railway hike isn’t a perfectly straight line, so the degree of slope varies throughout the hike. But… one guy I was hiking with measured it at 27 degrees in one spot. Another source clocked it at 35 degrees, and still another recorded a 49-degree incline for the whole second half. That’s crazy steep. You’re putting even the Cliffhanger from The Price is Right to shame here.

Koko Head hike calories & steps
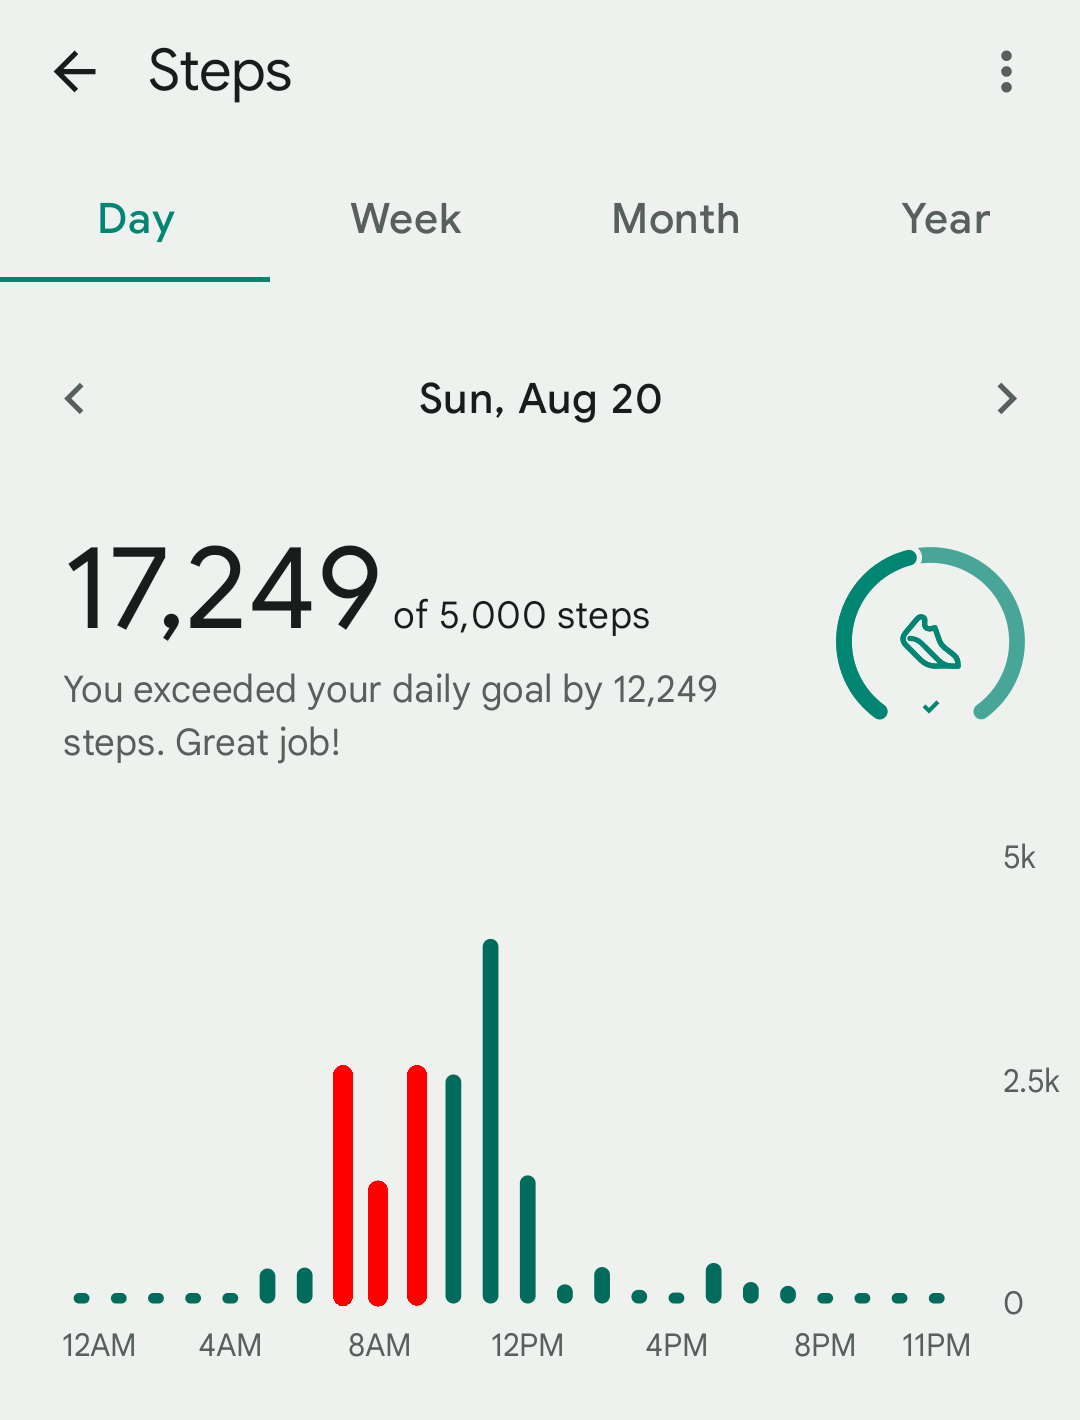
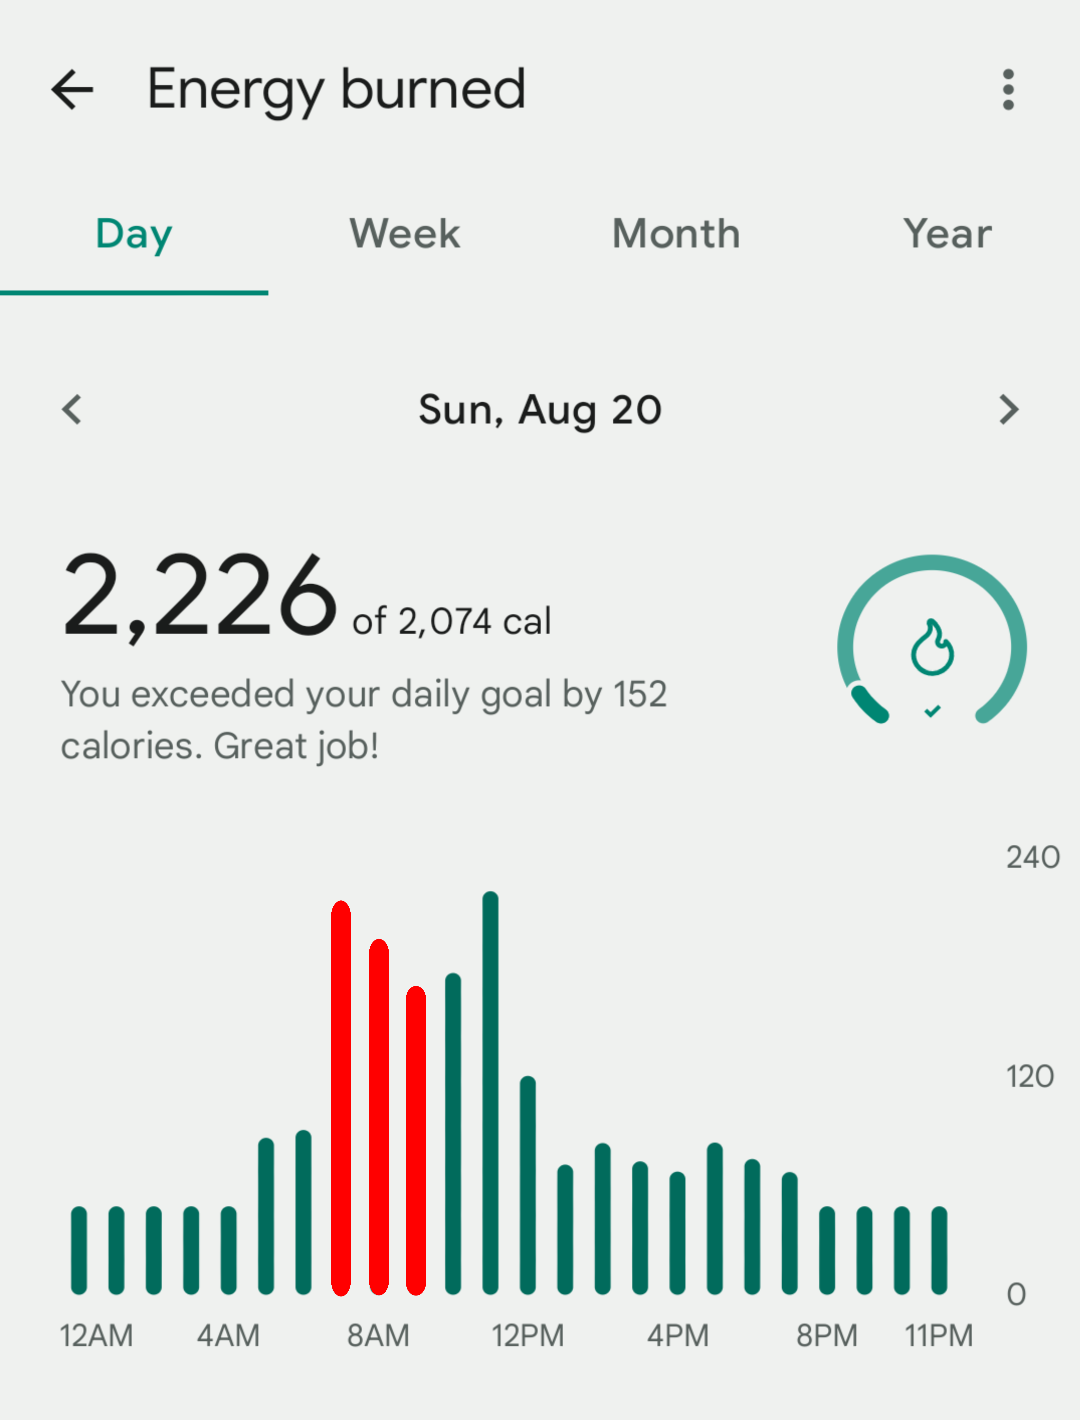
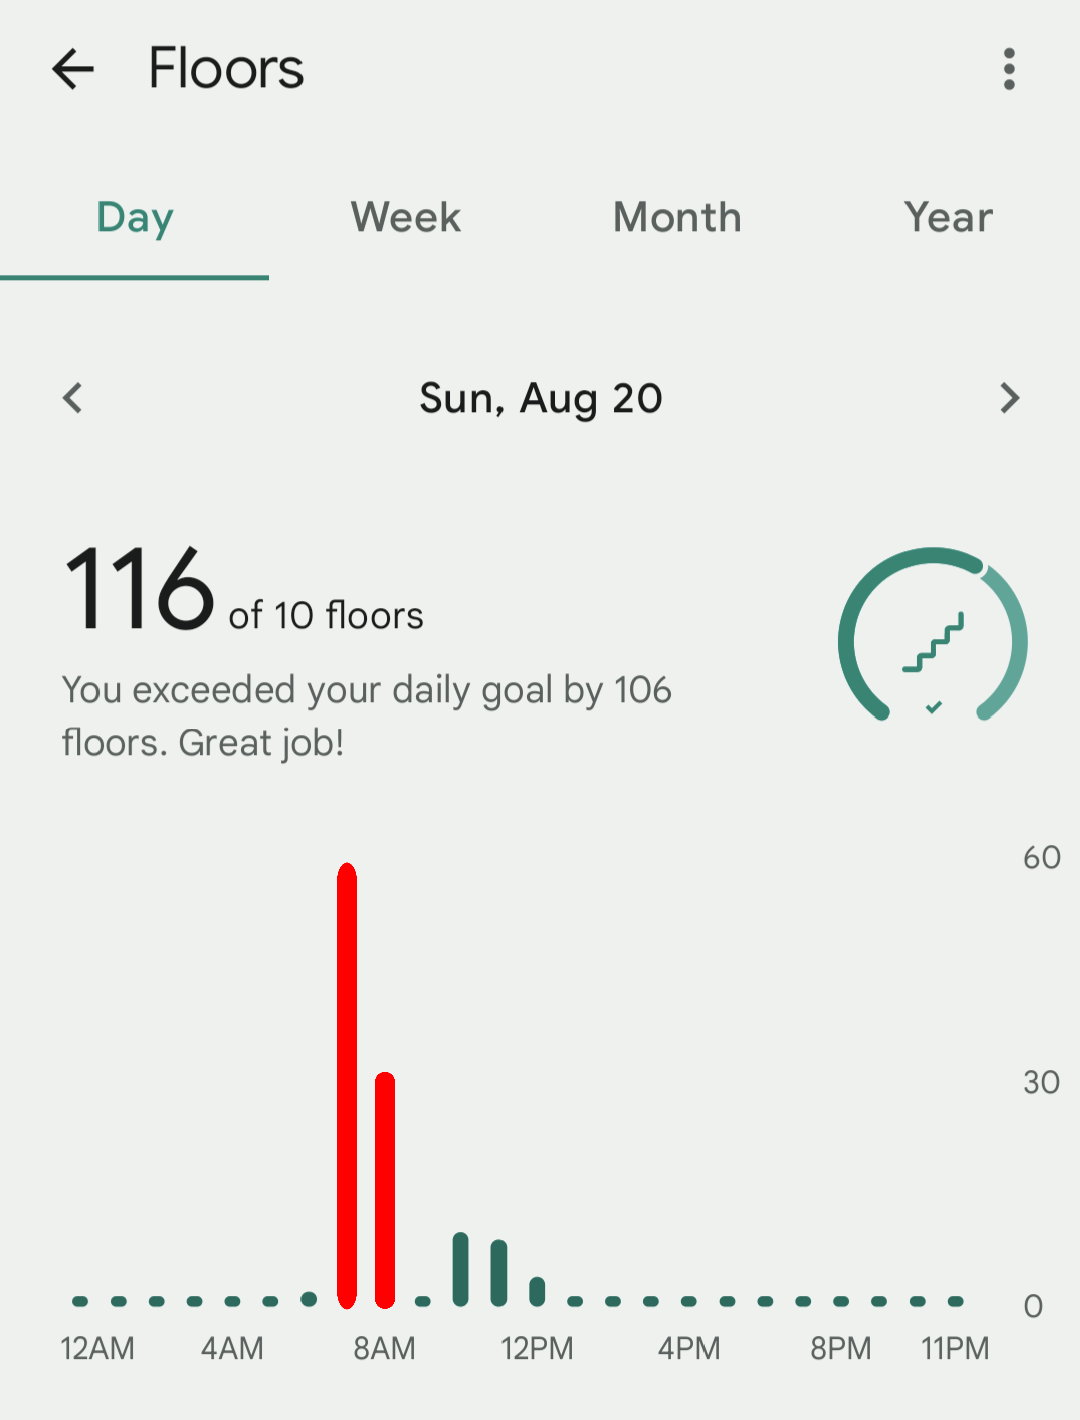
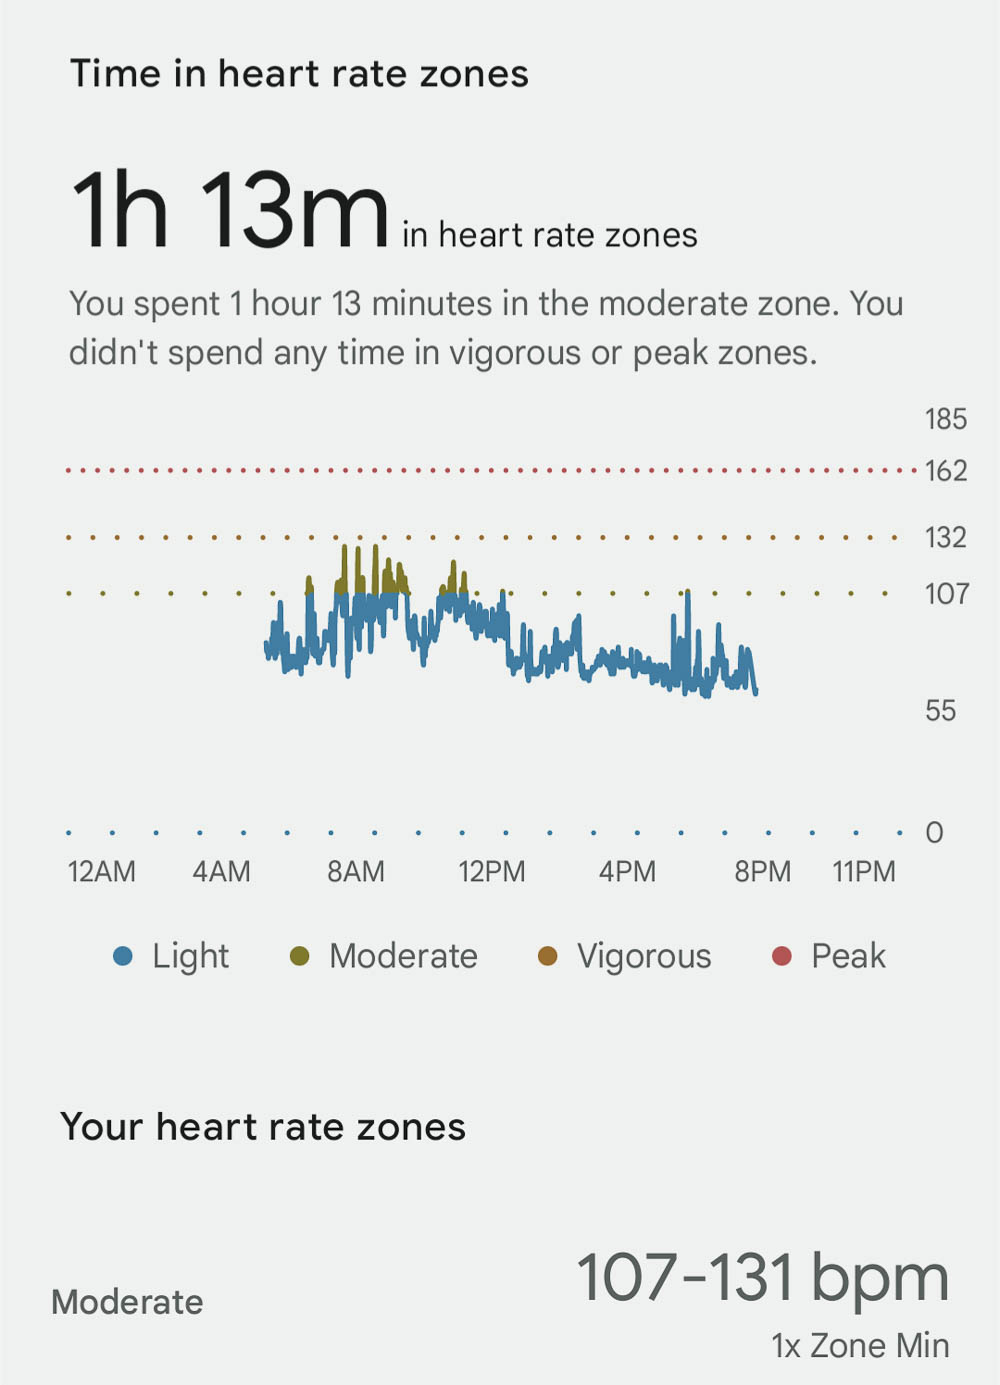
Some people ask about how many “steps” the Koko Head hike gives you (in Fitbit terms) and/or how many calories you burned on this hike. Obviously, this is different for everyone. Varying levels of physical fitness, different body types, etc. all make this impossible to predict. Even though yours will look different, here’s what the Koko Head hike looked like on my Fitbit for reference:
The red lines on the graph are the hike. (After I did the hike I basically power walked around the Aloha Stadium Swap Meet four or five times, which is why it looks like the Koko Head hike was not the most physically exhausting thing I did that day.)
- Steps taken: 6,604
- Floors climbed: 90
- Calories burned: 573
Koko Crater hike terrain
The terrain on the Koko Head Crater hike is anything but ideal and can make for some seriously dangerous hiking conditions. On the Koko Crater hike, prepare for:
- Loose dirt in dry weather; mud in wet weather (both serious slipping hazards)
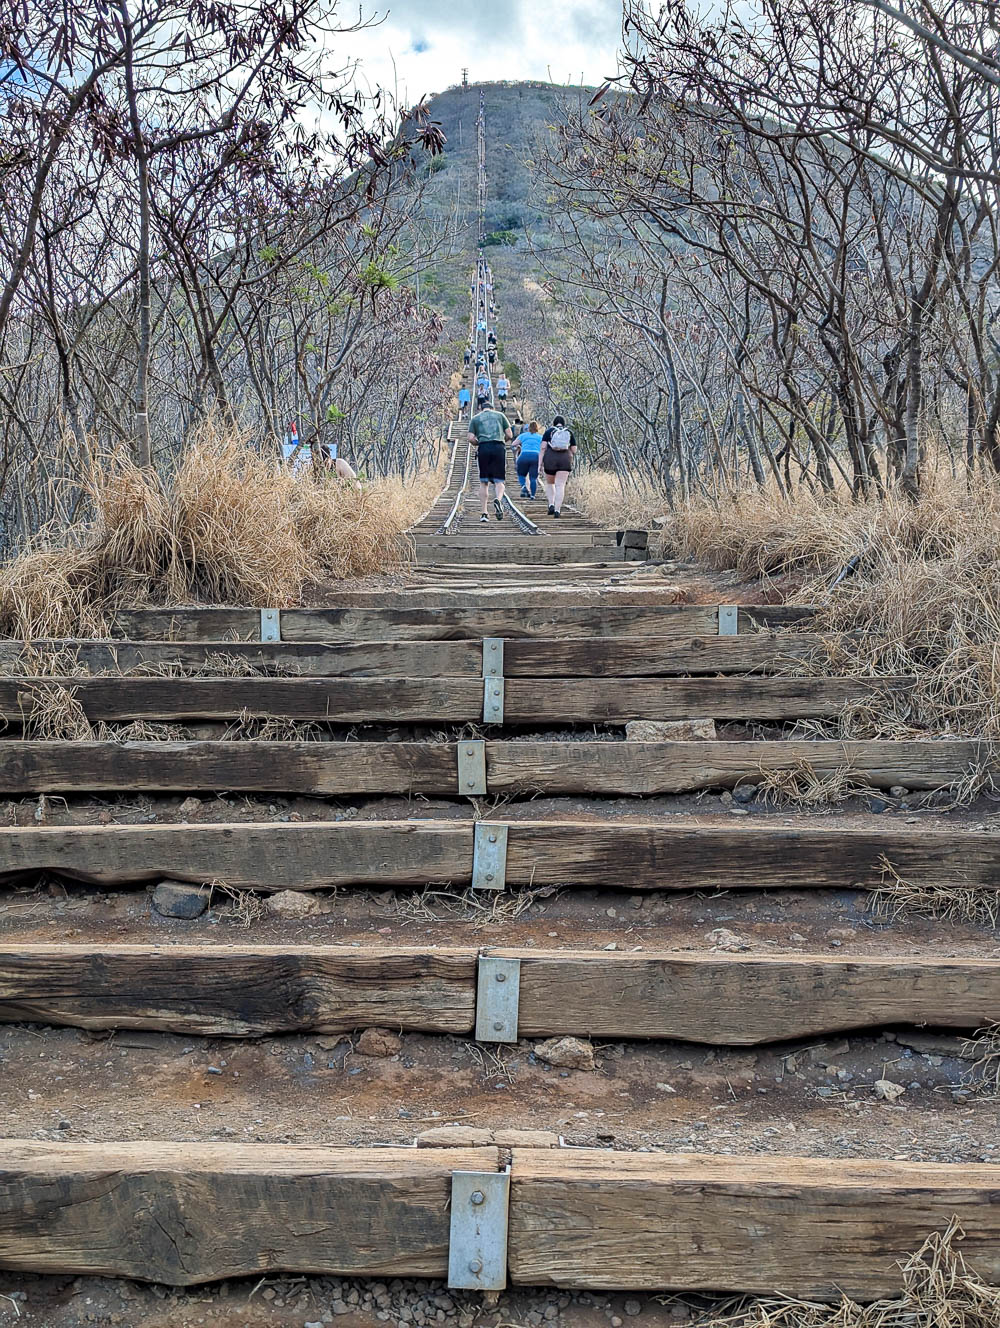
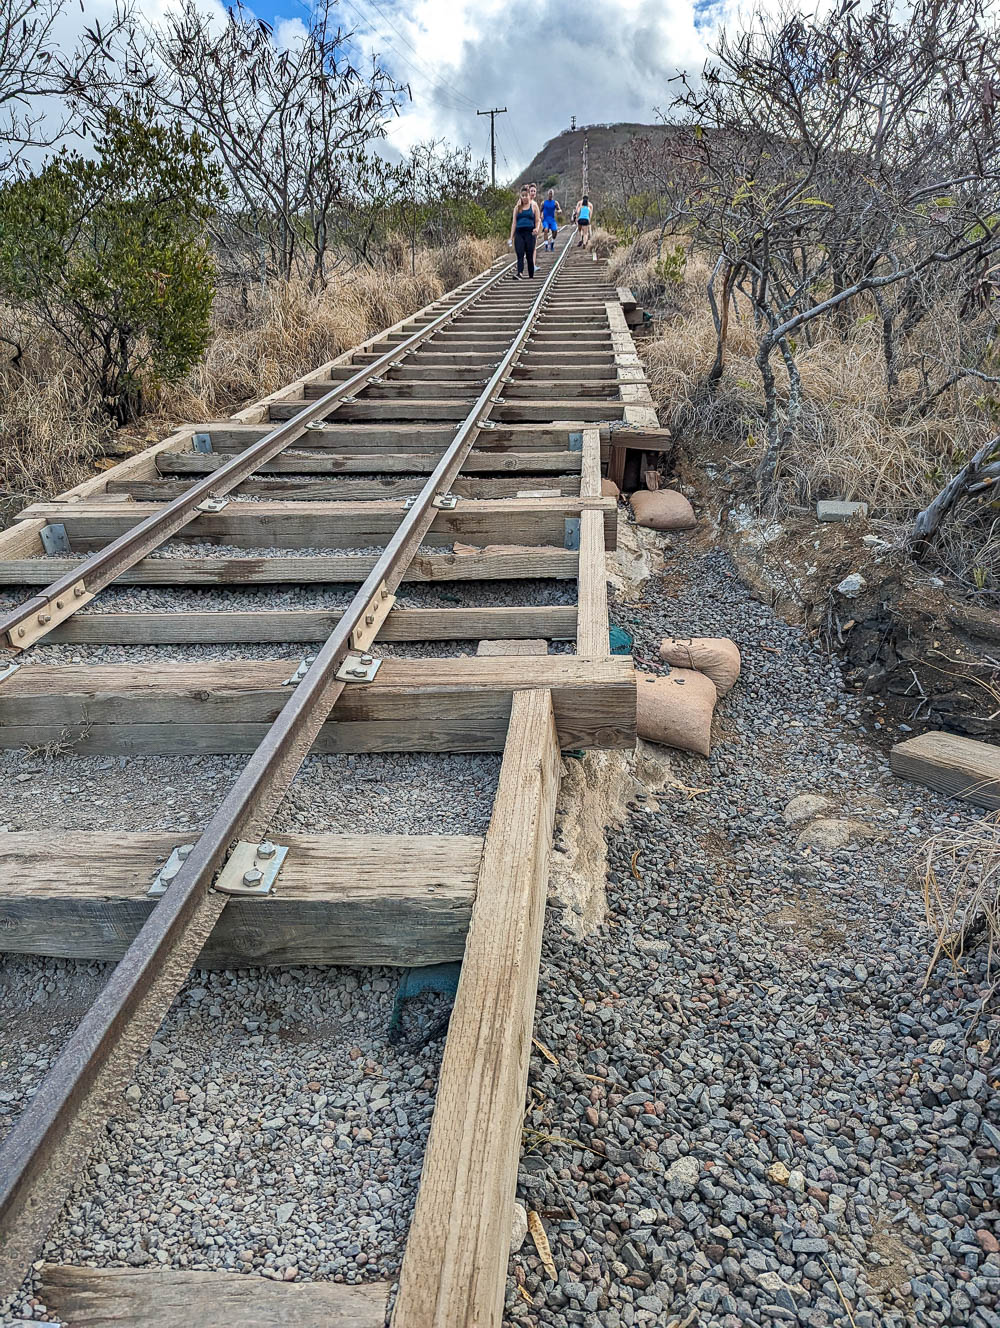
- Wooden beams spaced about 2-3 feet apart in various stages of decay
- Uneven surface, lots of deep holes and divots
- Tons of trees, roots, and rogue branches
- Countless pieces of rusty metal scraps
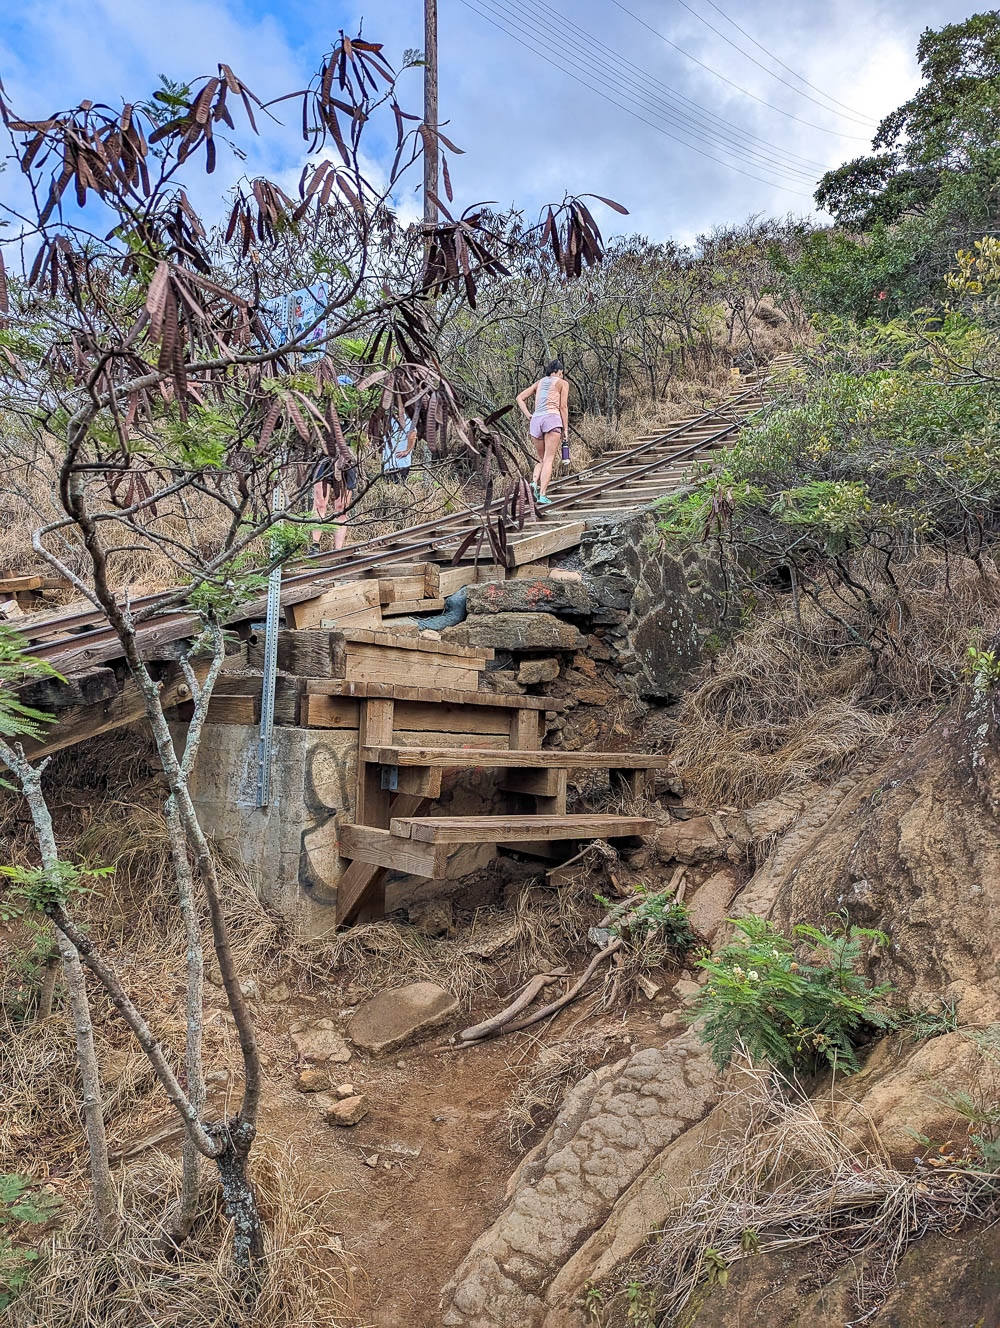
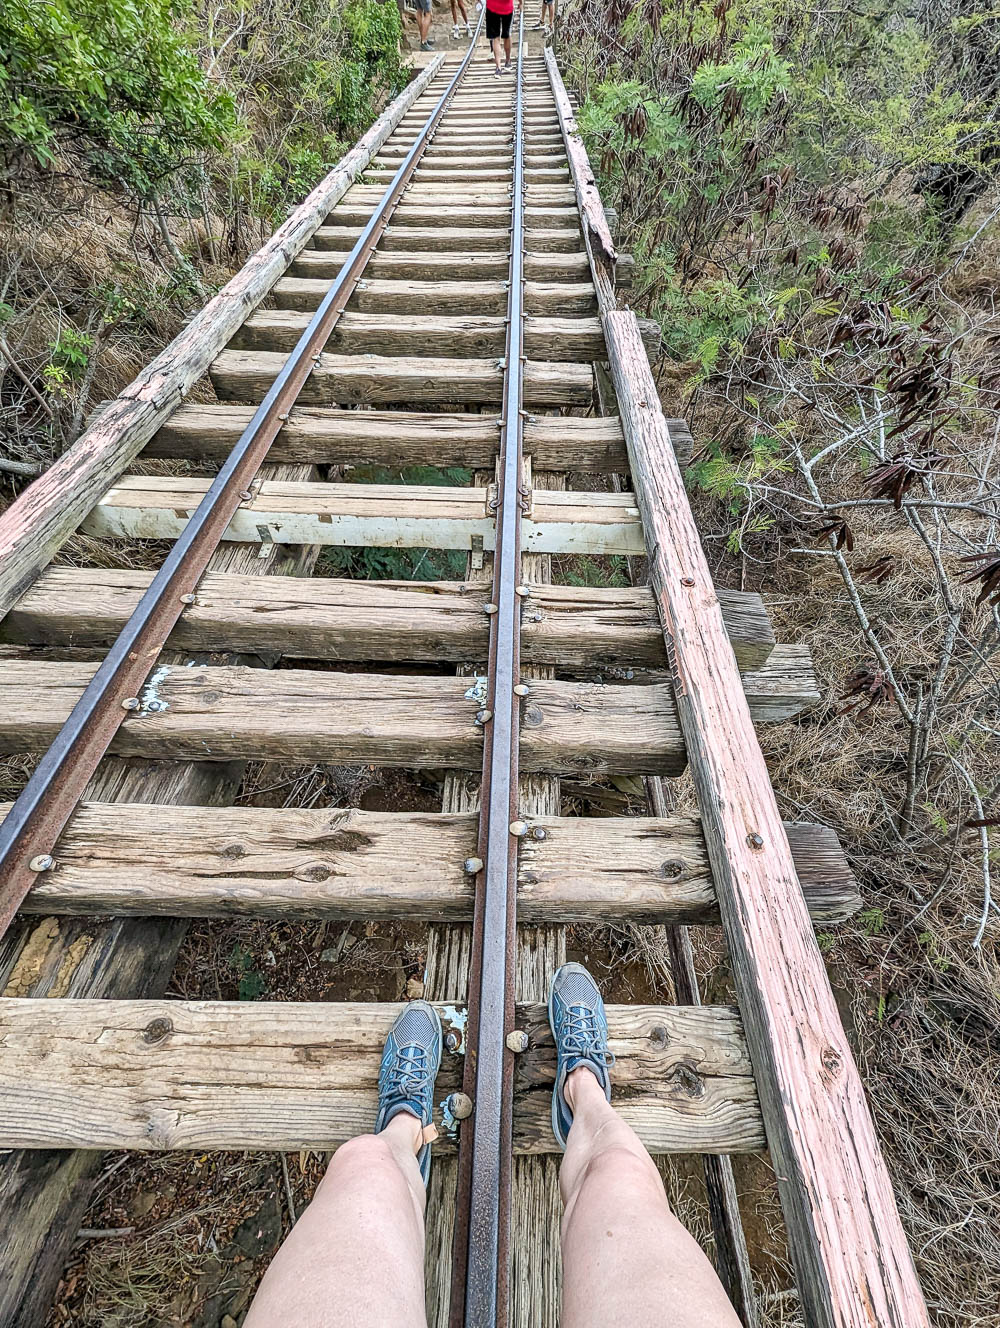
The condition of the wooden railroad ties on the Koko Head railway hike varies in terms of stages of decay. I was pleasantly surprised to find that most of them seemed pretty solid having been recently replaced. However, there were still many that were weak and rotted.
The Tramline Bridge and Murphy’s Bypass
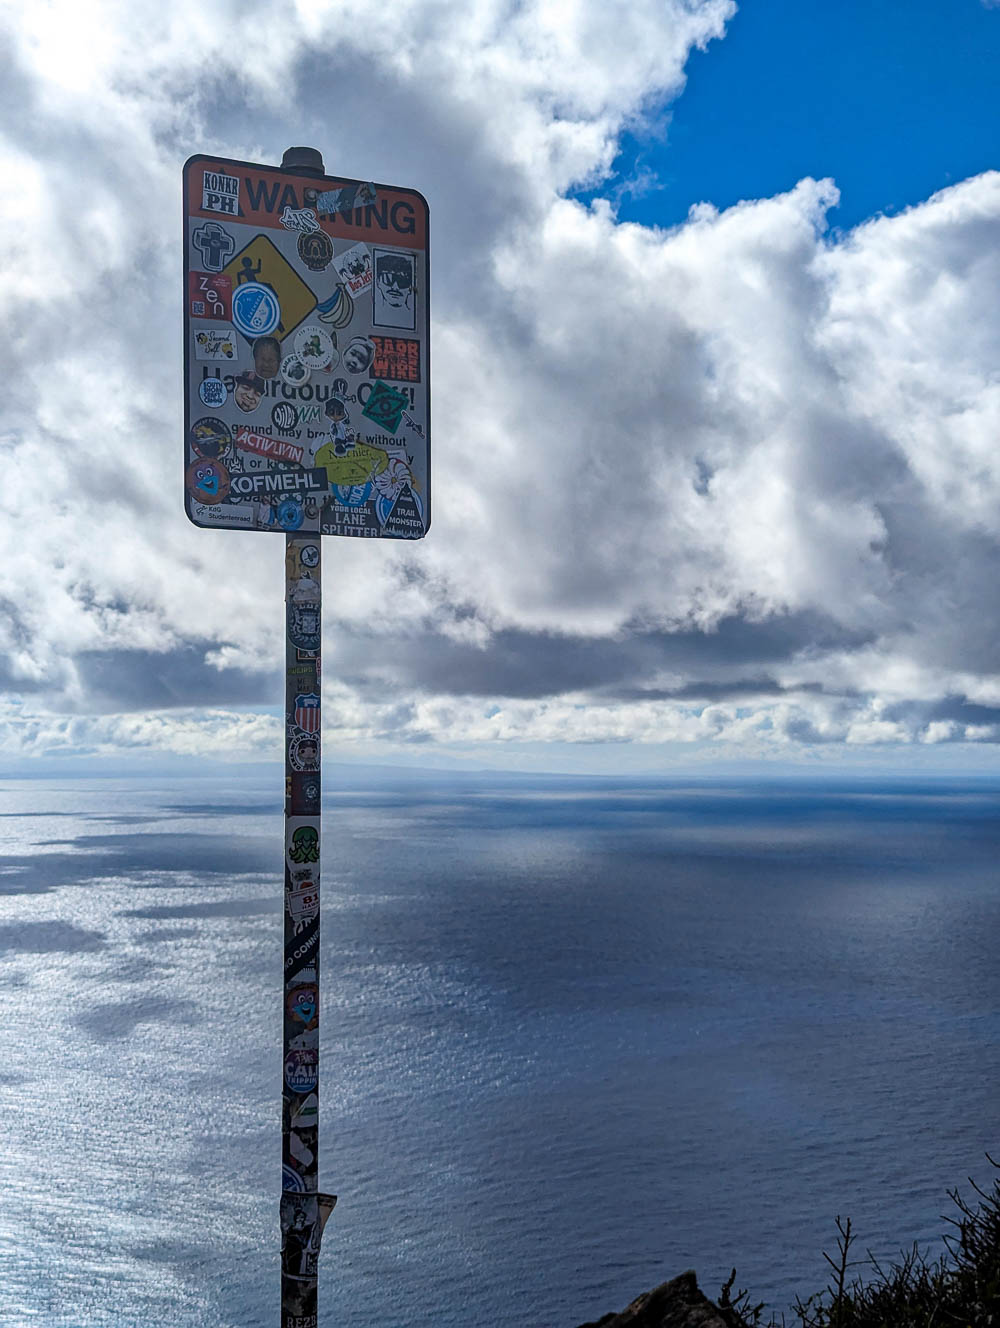
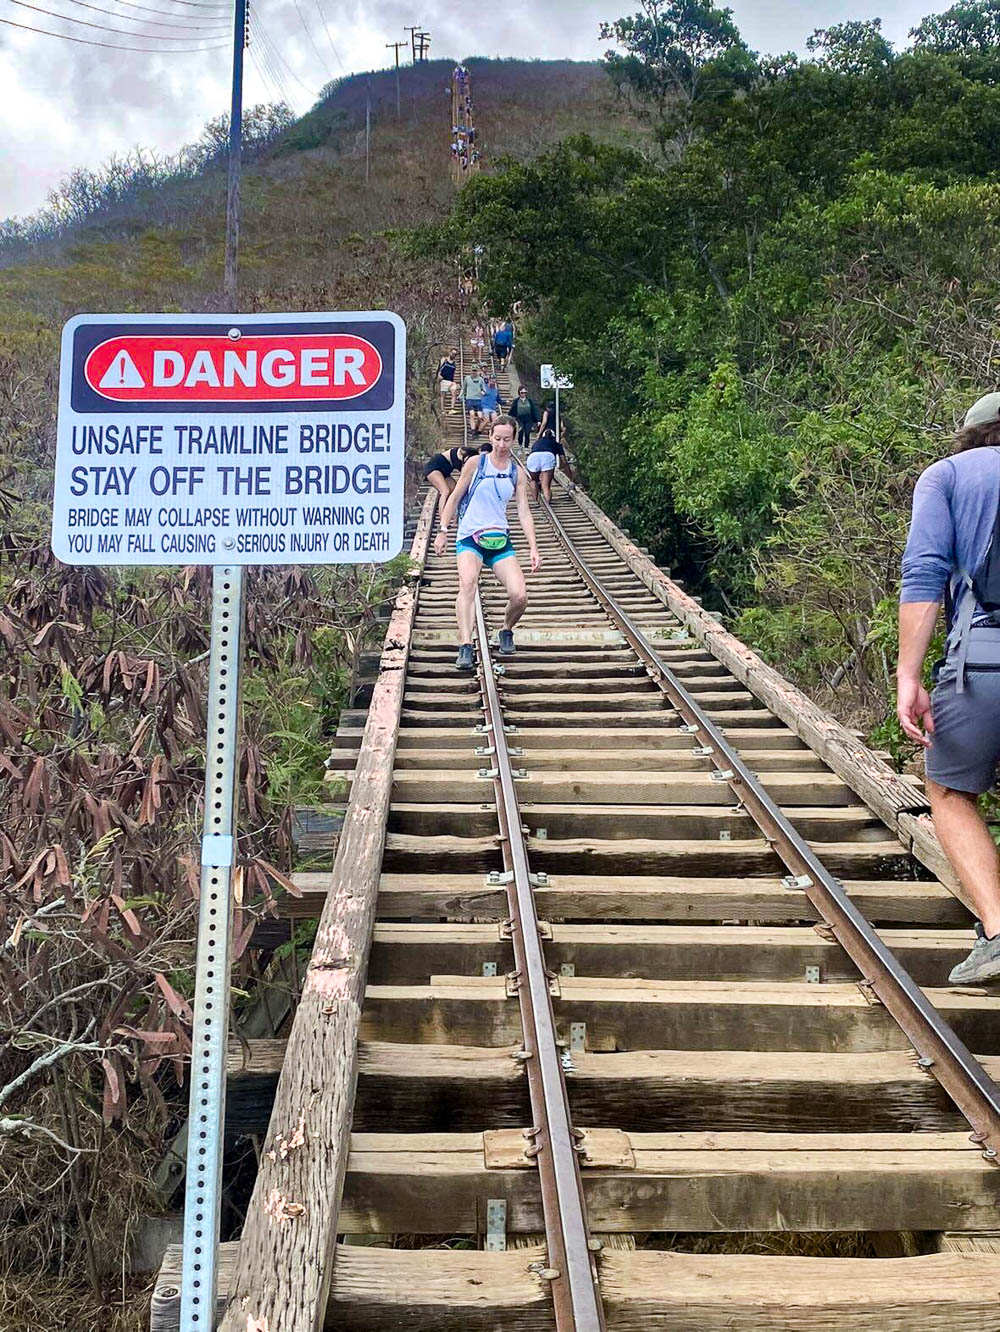
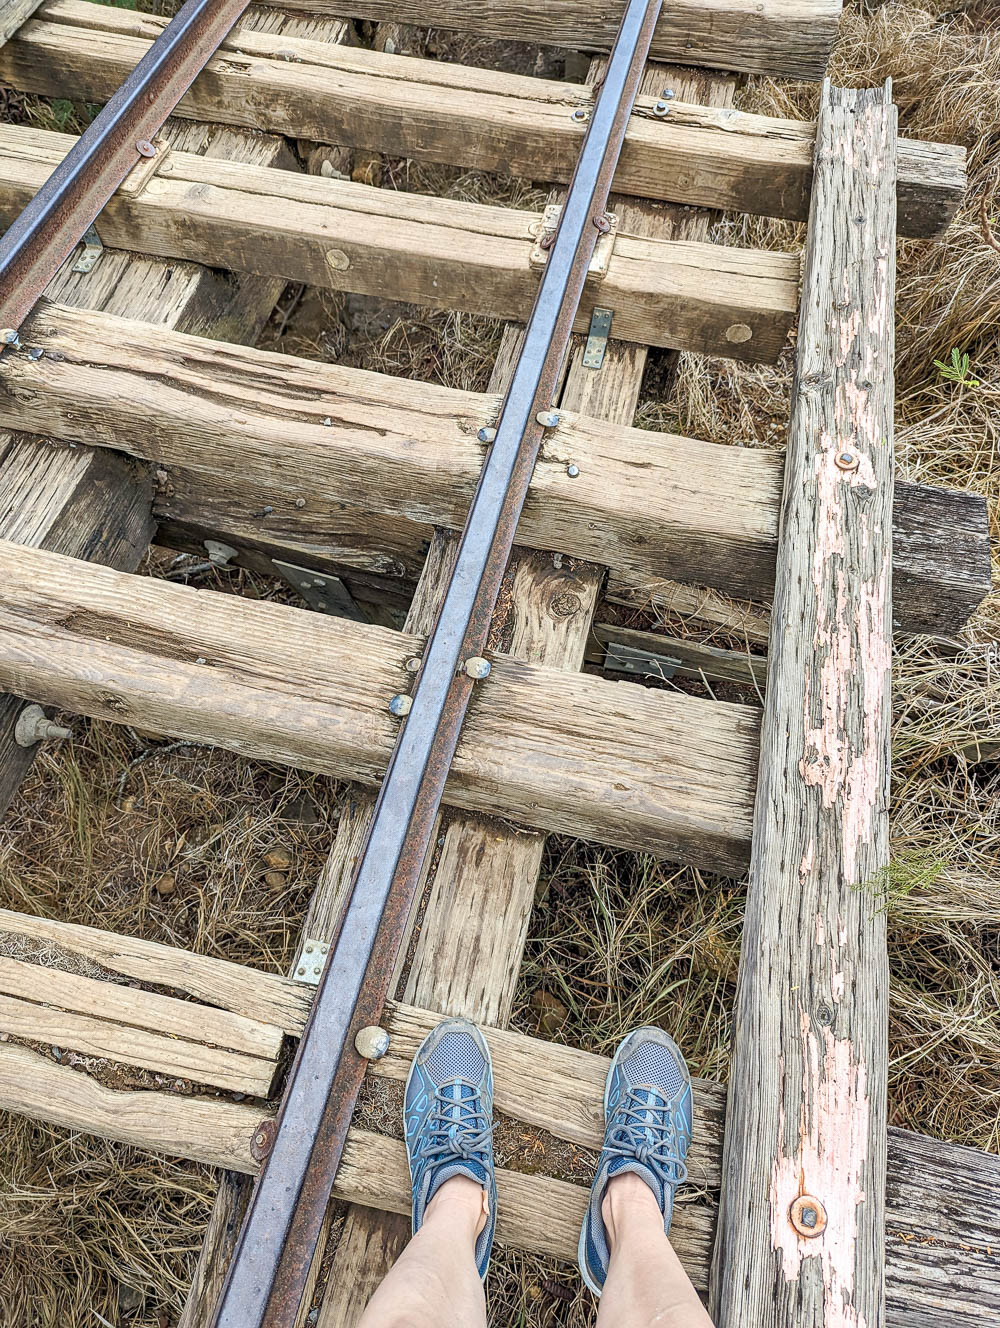
A little ways up the Koko Head railway trail is the tramline bridge, a section of the railway that passes over a ravine. The railroad ties are still there, but there’s nothing under them but air. A warning sign lets you know how dangerous this is and that you could totally die here. I don’t know about all that, but basically they’re telling you to cross it at your own risk.
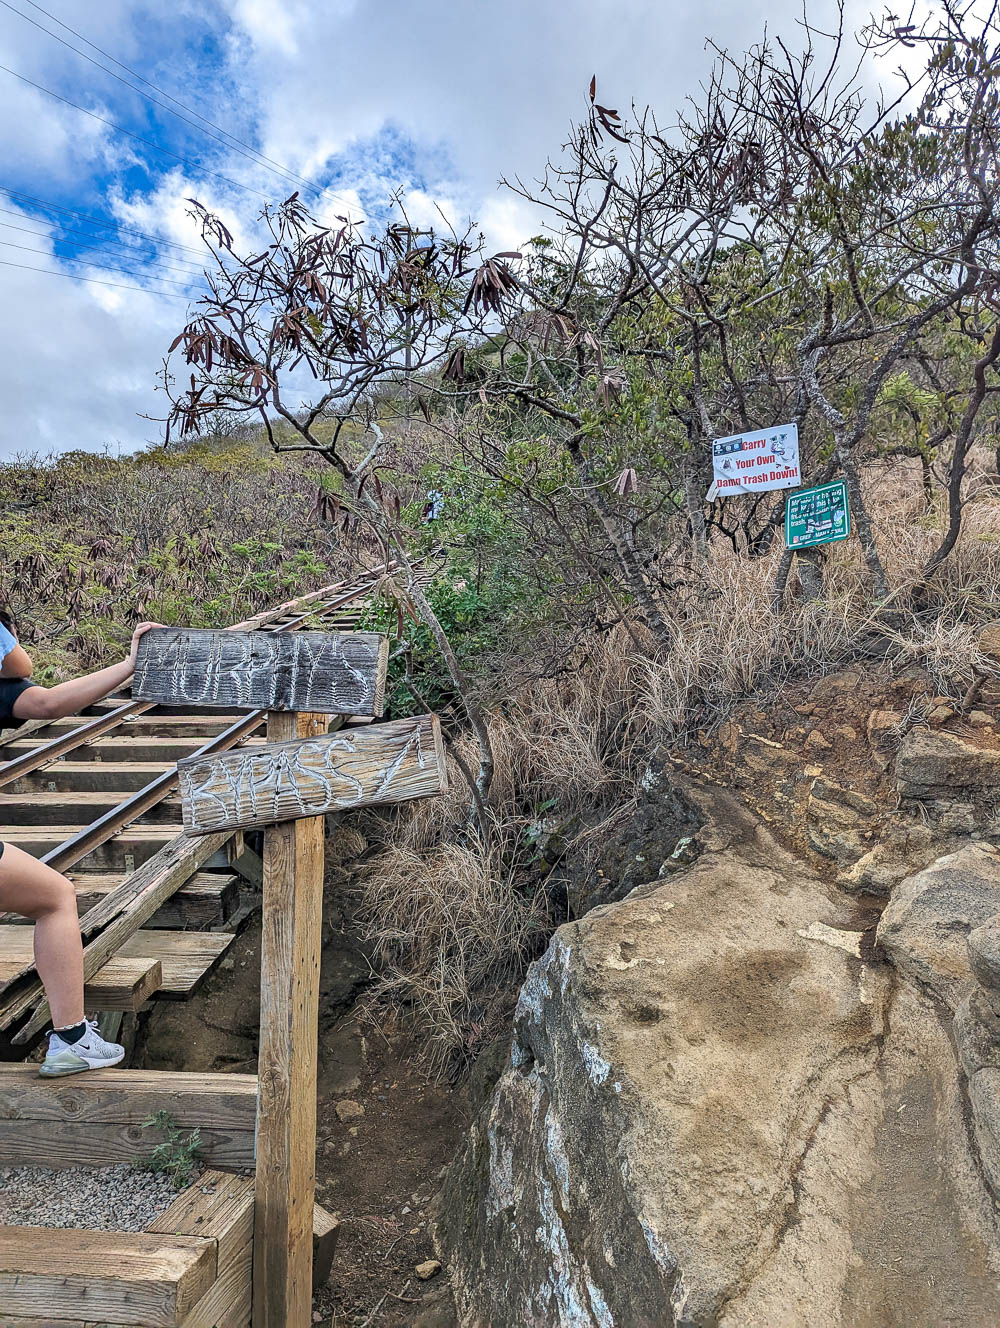
This section of the trail isn’t very long and most hikers just blaze right over it. However, there is a bypass you can take if you want to avoid it. When you get to the sign for “Murphy’s Bypass,” turn right, into the trees, and you can climb up a rough makeshift “path.” You can do the same thing on the way down.
On the way up, I took the bypass out of an abundance of caution. On the way down, I took the tramline bridge out of curiosity. (See me above making poor choices.) If you want to try both, I’d recommend doing it the opposite way. (But still, note the warning signs!)
The fall from the bridge isn’t so far down that you’d for sure die, but you’d definitely injure yourself. (It really only looked to be about 10 feet down, but what do I know?) Regardless, you still have to go very slow on the bridge and be 100% surefooted. Plus, looking down the whole time is disorienting and scary.
Interested in crazy, stomach-churning hikes, are ya? Then check out the via ferrata I did in Switzerland!
Koko Crater hiking conditions
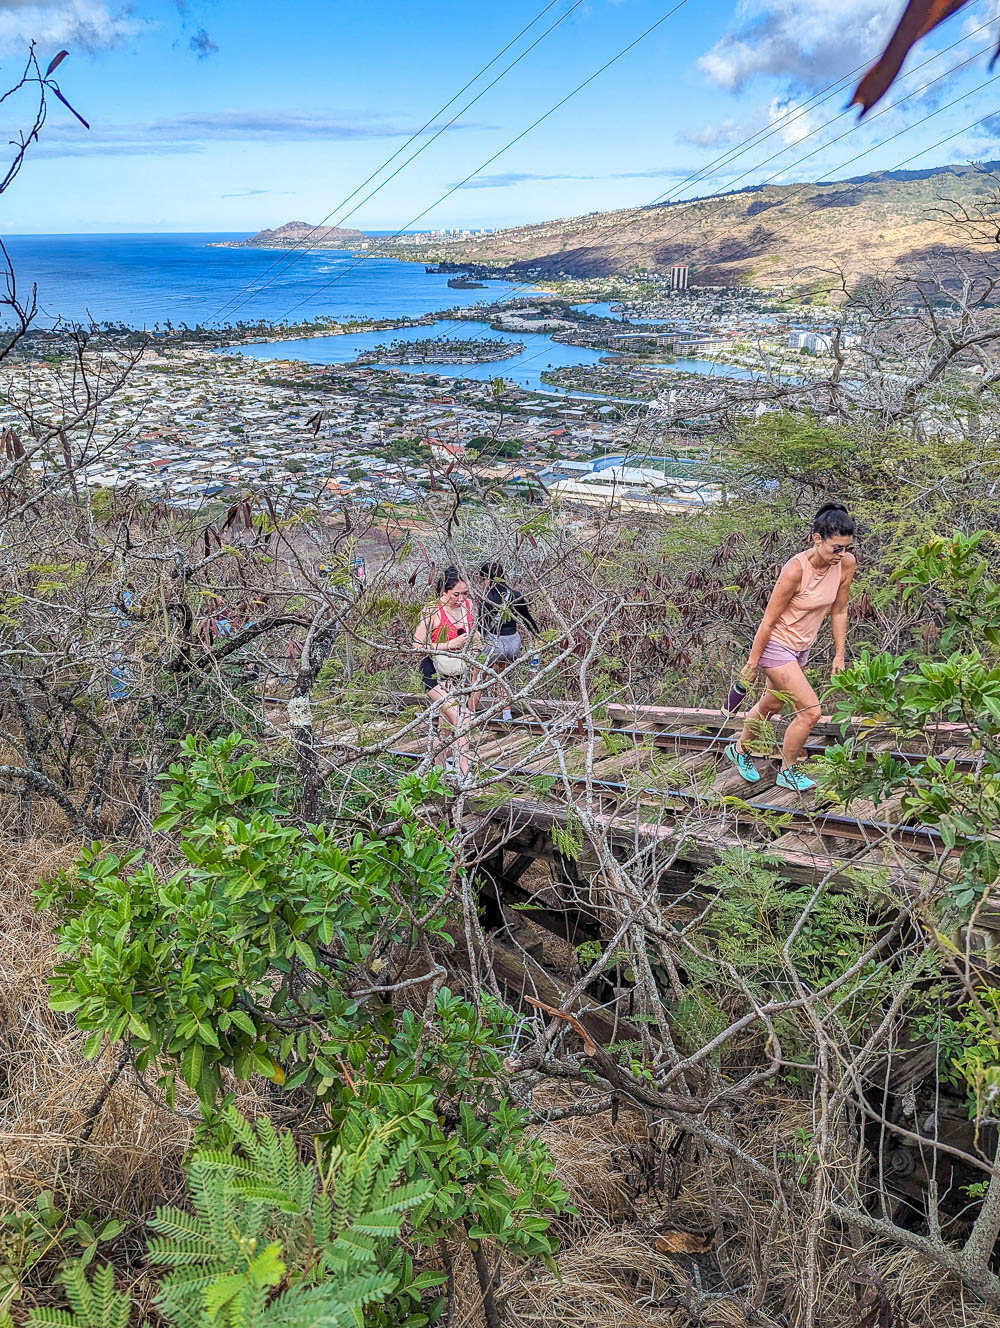
Just as the terrain is not ideal, so are the Koko Head railway hiking conditions. Really, this is the kind of stuff you typically try to avoid. On the Koko Head Crater hike you can expect:
- Full exposed hike, very little shade
- Full sun, super hot and humid
- Super crowded trail
- A camaraderie like none other
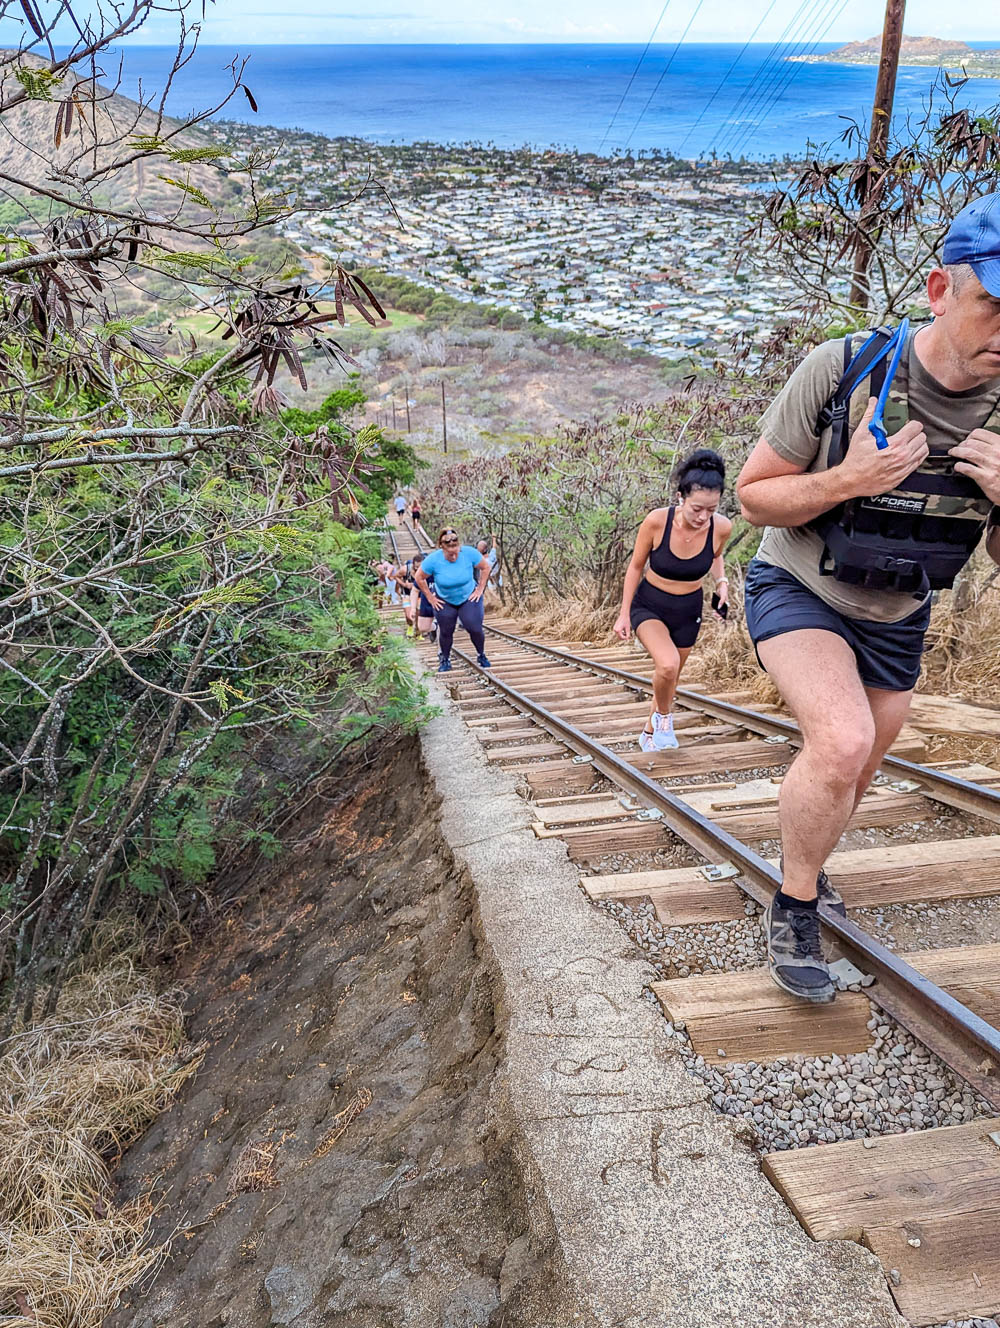
Given the popularity of this trail locally, the Koko Head railway hike tends to be super crowded. (There are even tour groups that will take you here!) And all with the sweatiest, grossest hikers you’ve ever met. I spoke with many locals who use the Koko Head stairs as their daily/weekly workout. One woman (who struggled to put one foot in front of the other) says she does it every Sunday. I also saw several active duty military running up and down the trail with weighted vests on.
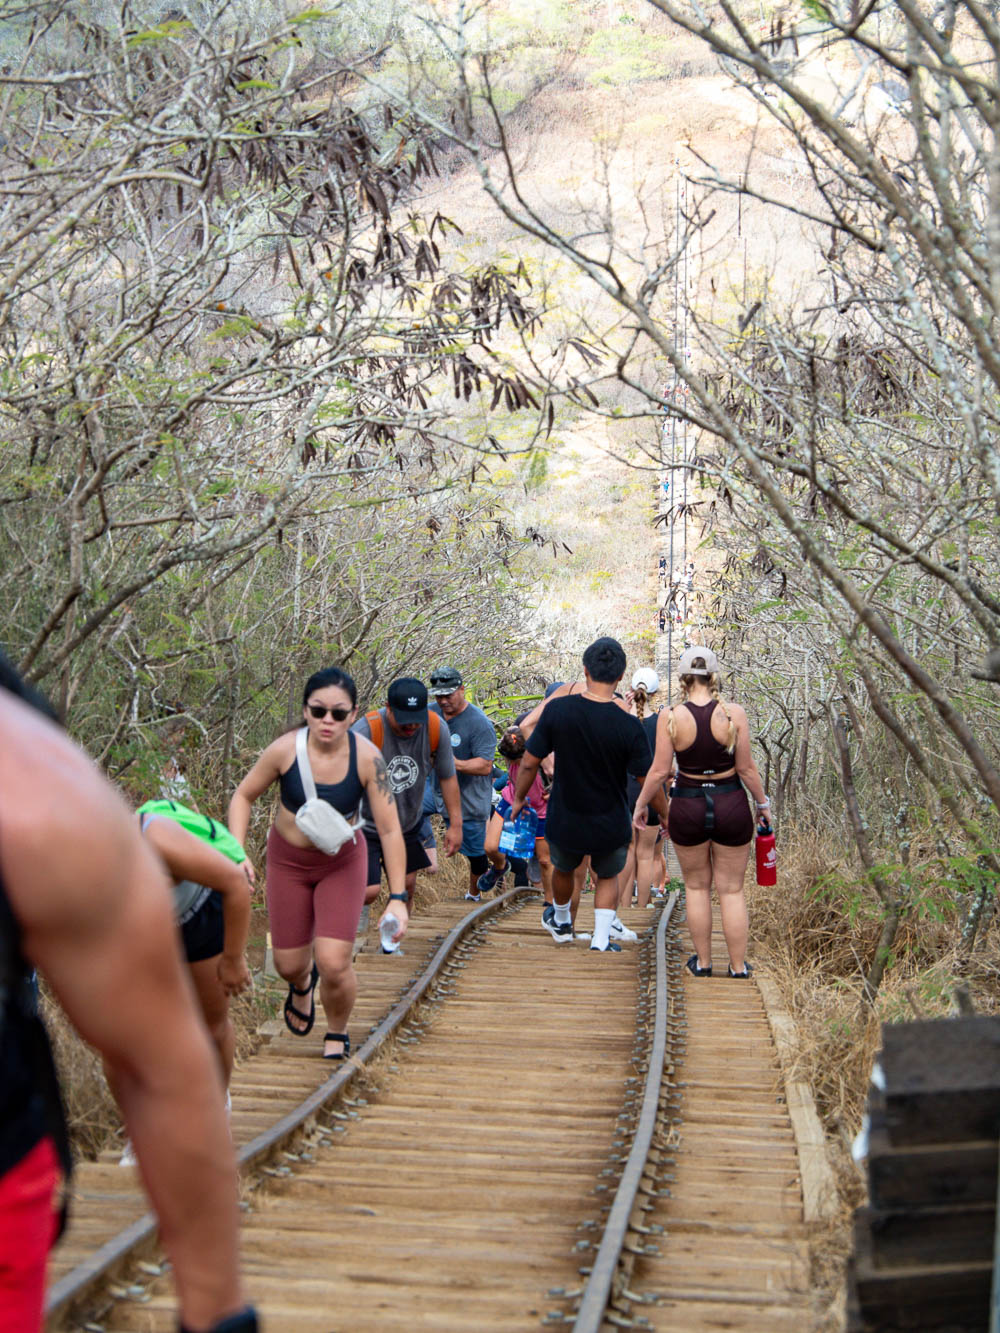
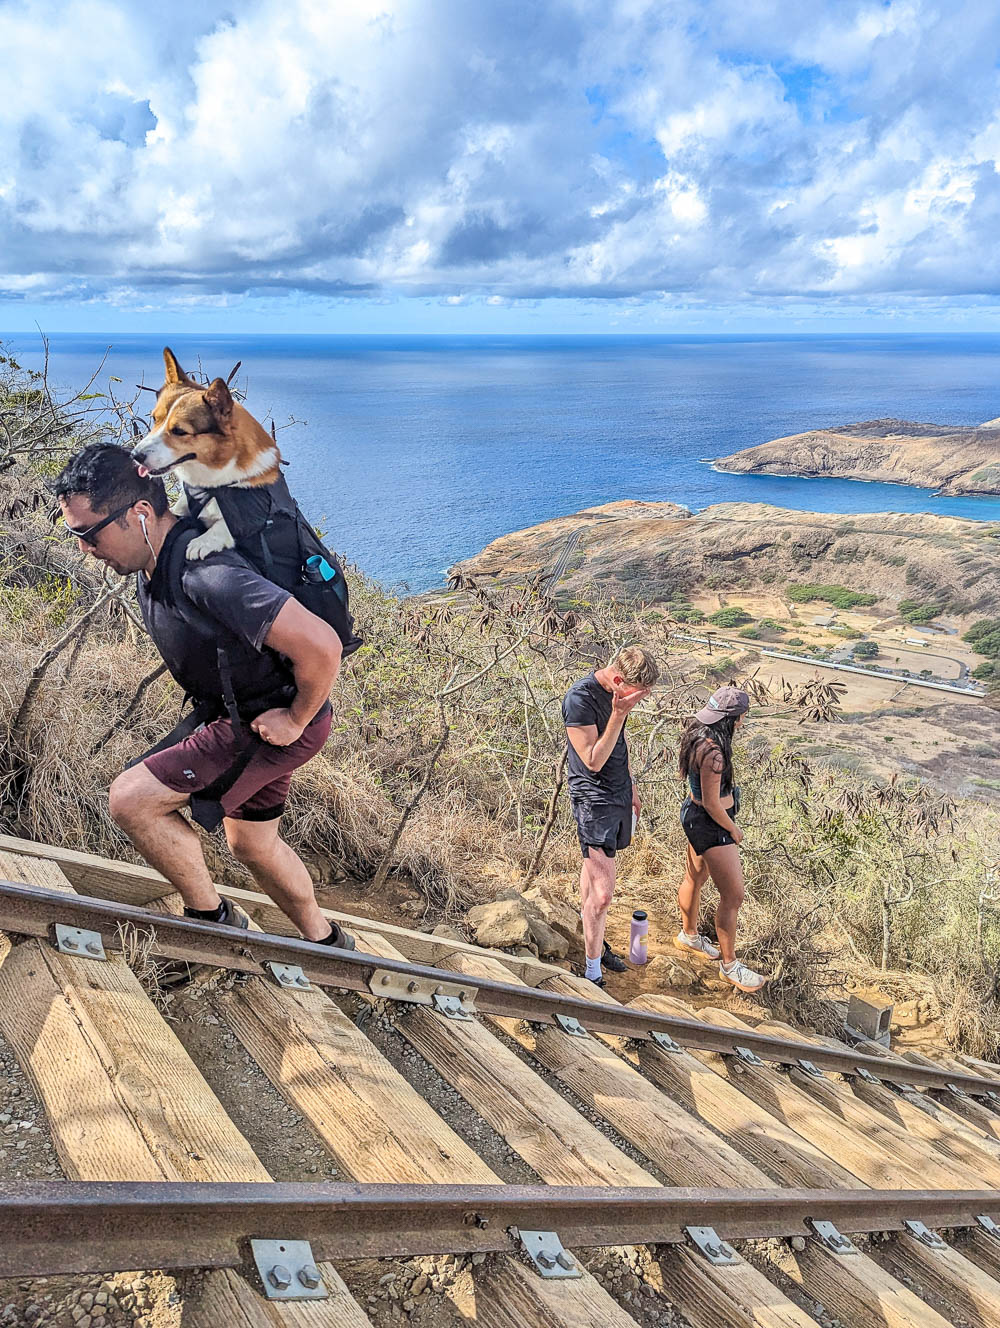
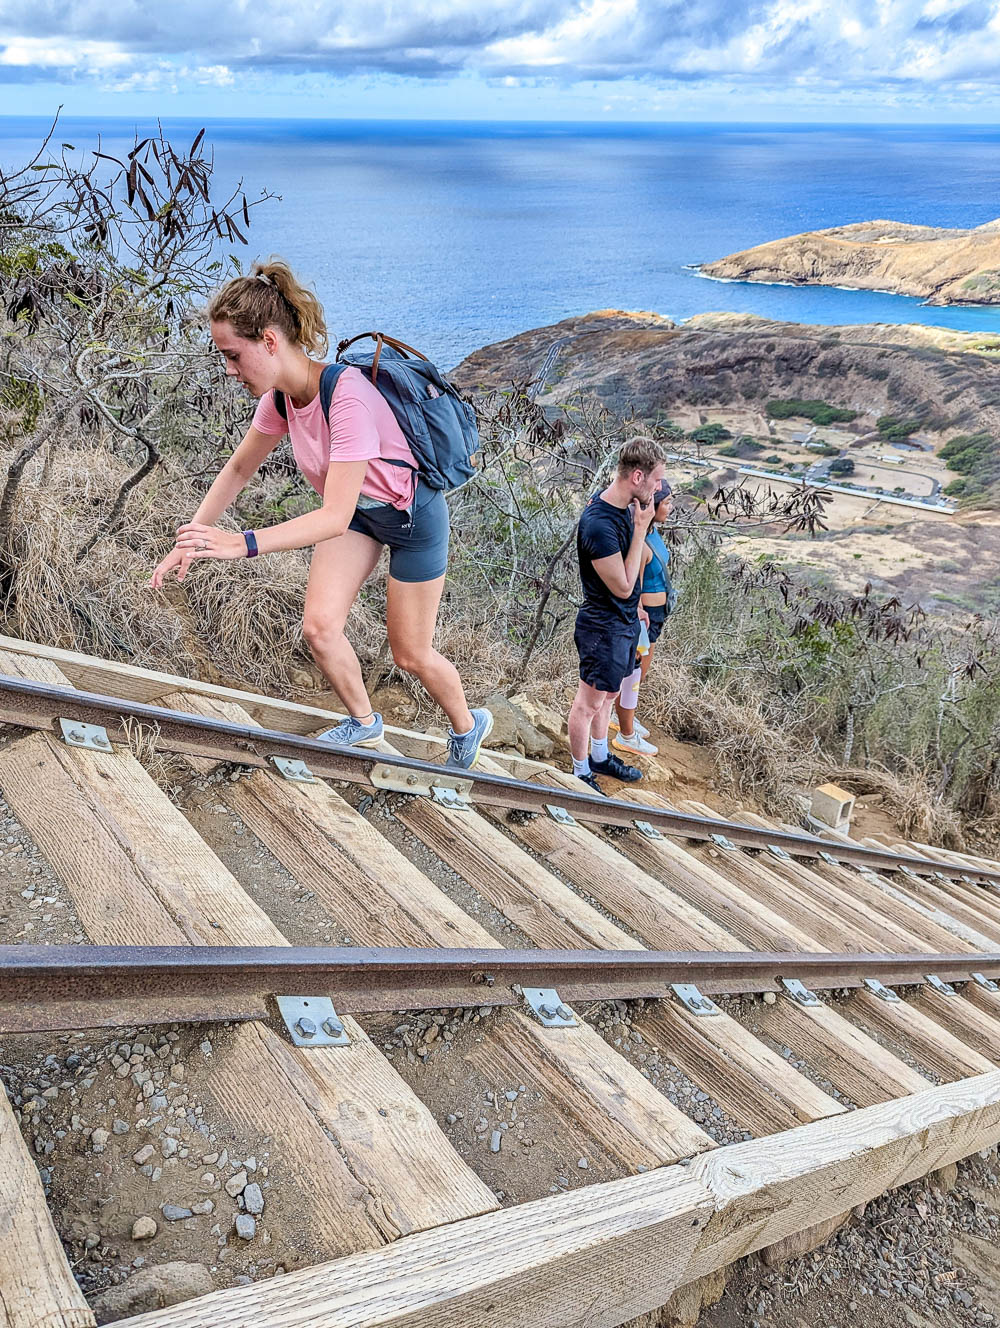
You will constantly have to move out of the way of hikers running up and down the trail. You will have to step off the railroad tracks and stand precariously on the side when you stop to take your many breaks.
However, the vast majority of hikers on this trail are struggling just as hard as you are. I personally refer to this hike as the “great equalizer” because there were people of all ages, sizes, and weights all struggling the same. Many friendships are forged on that mountain as everyone can relate to the person next to them. I saw so many people cheering on others they’d never met; it was beautiful.
Is this post making you sweat yet? My post on the time I rappelled down frozen waterfalls in Canada should cool you down.
Koko Head Crater hike views
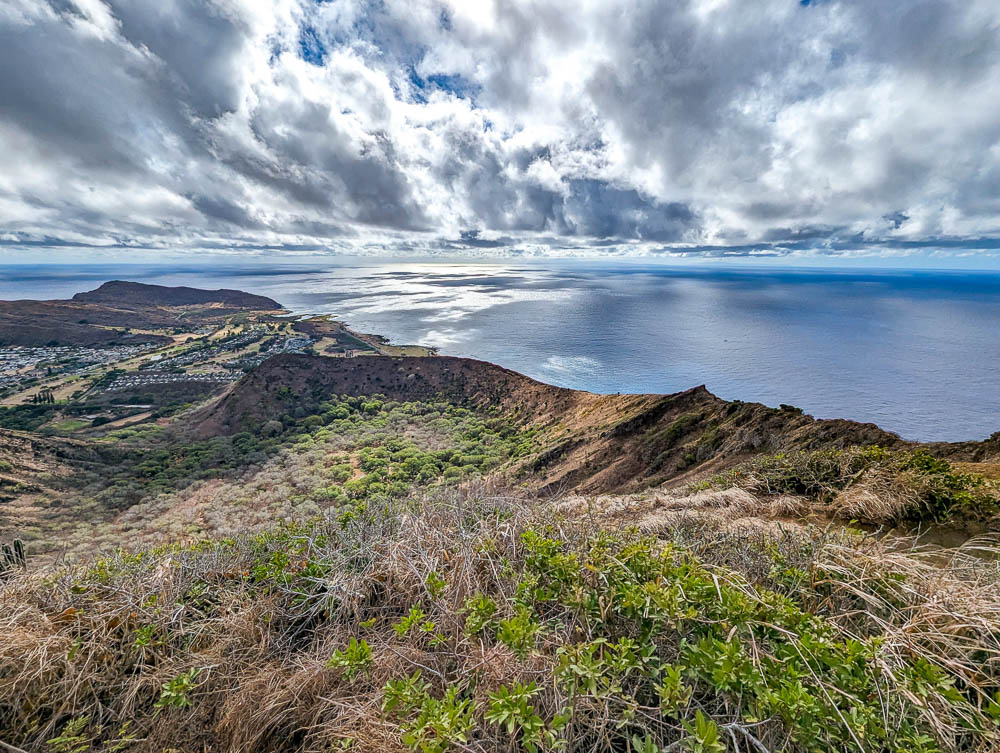
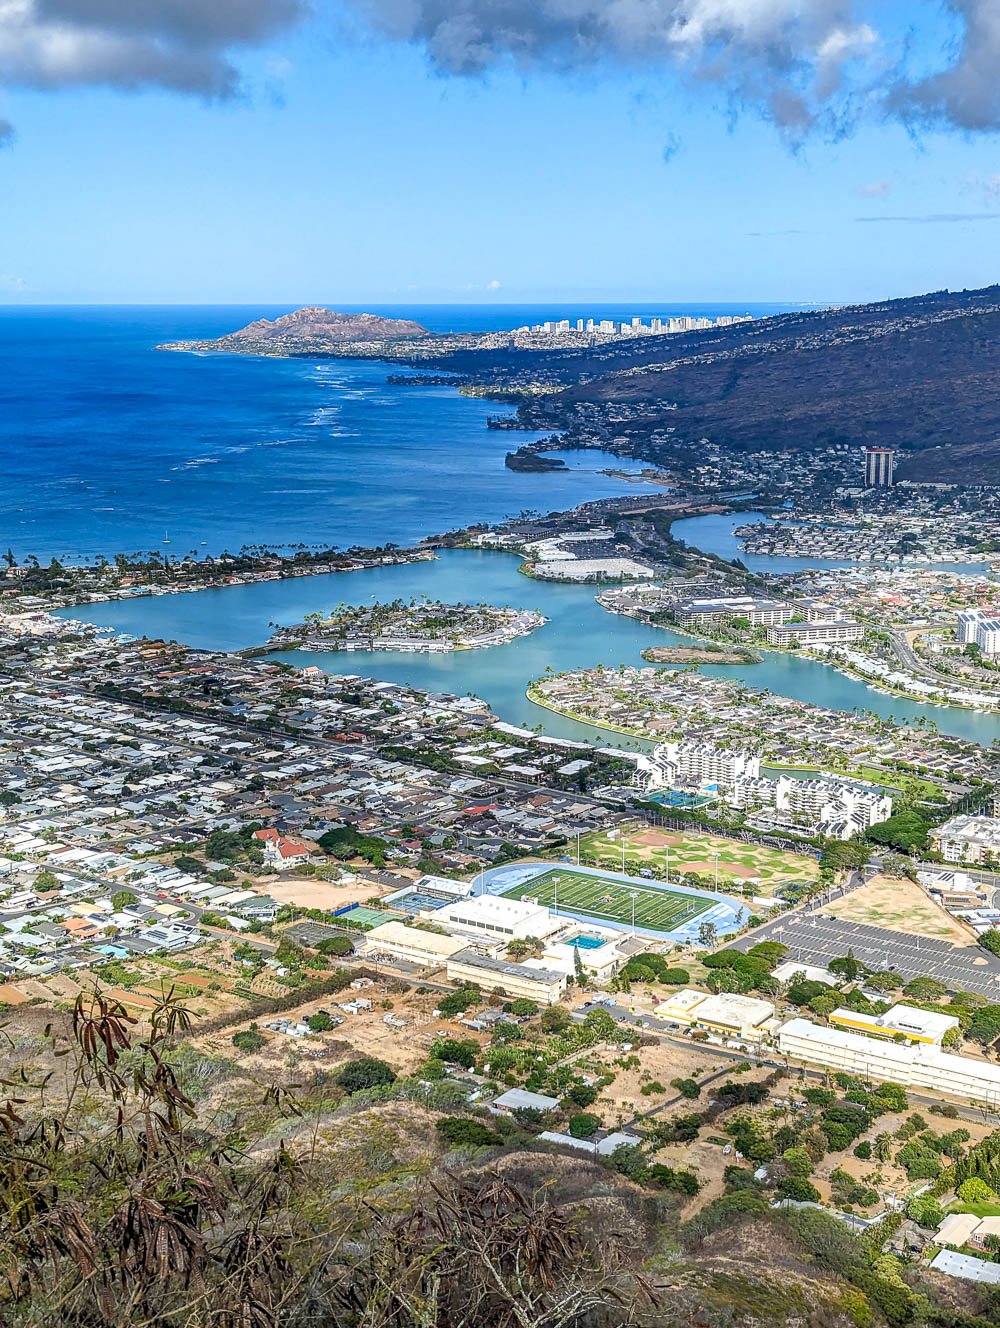
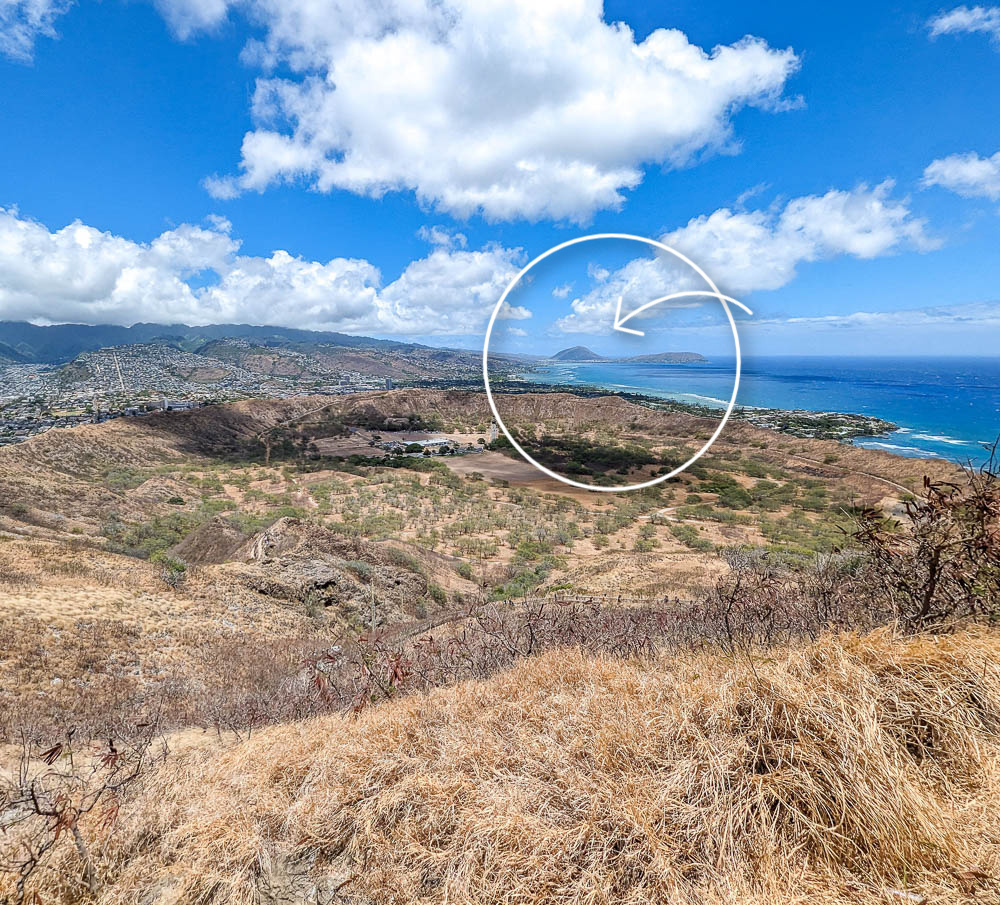
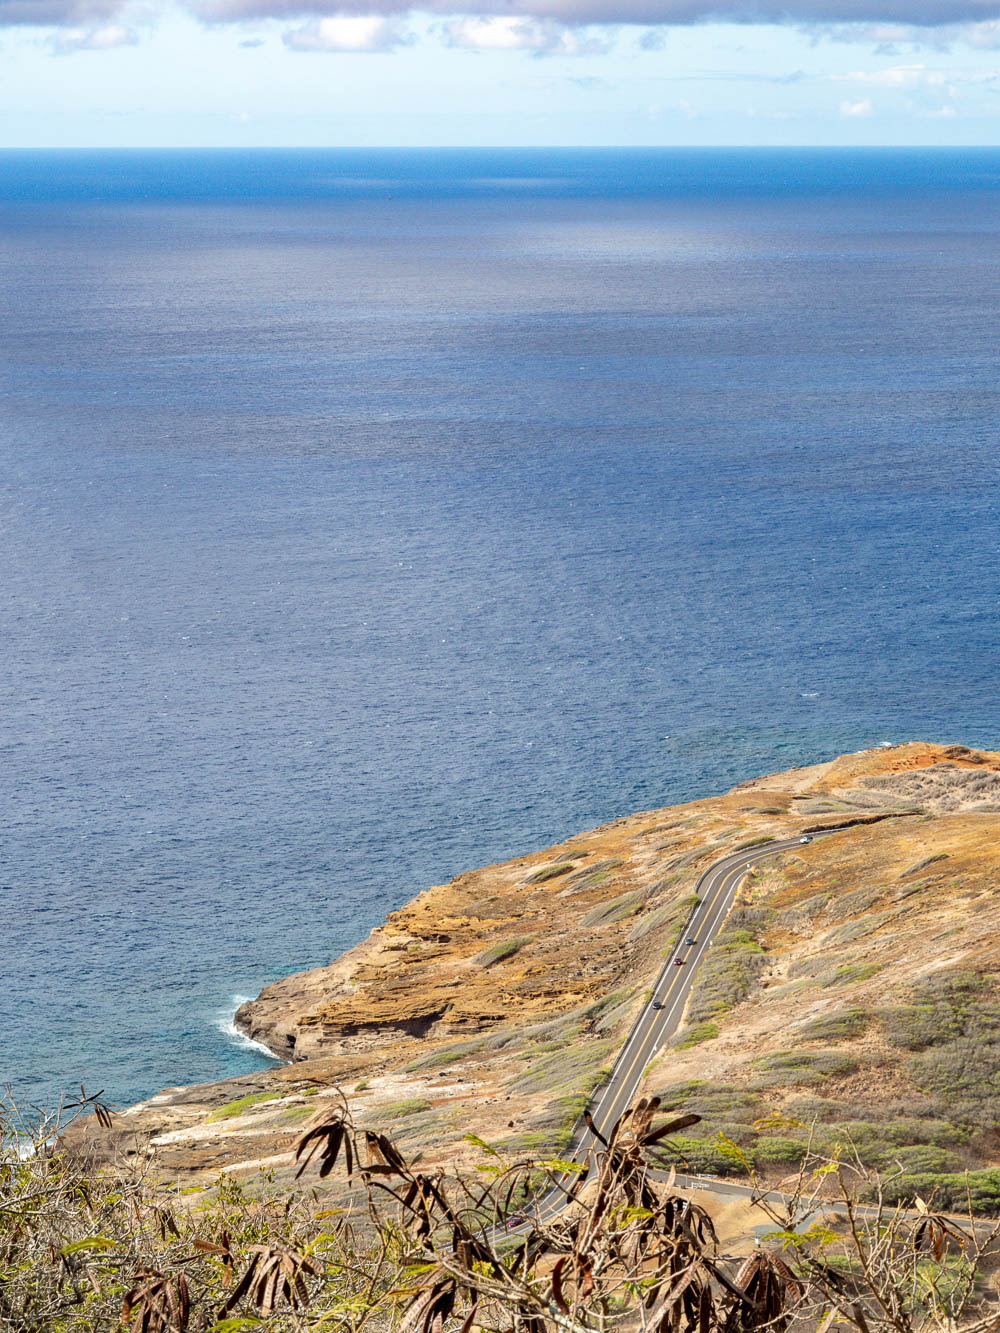
When you reach the top, you’re rewarded for your struggles with gorgeous 360° views of southern Oahu. (And a life-giving breeze!) From the top you can see:
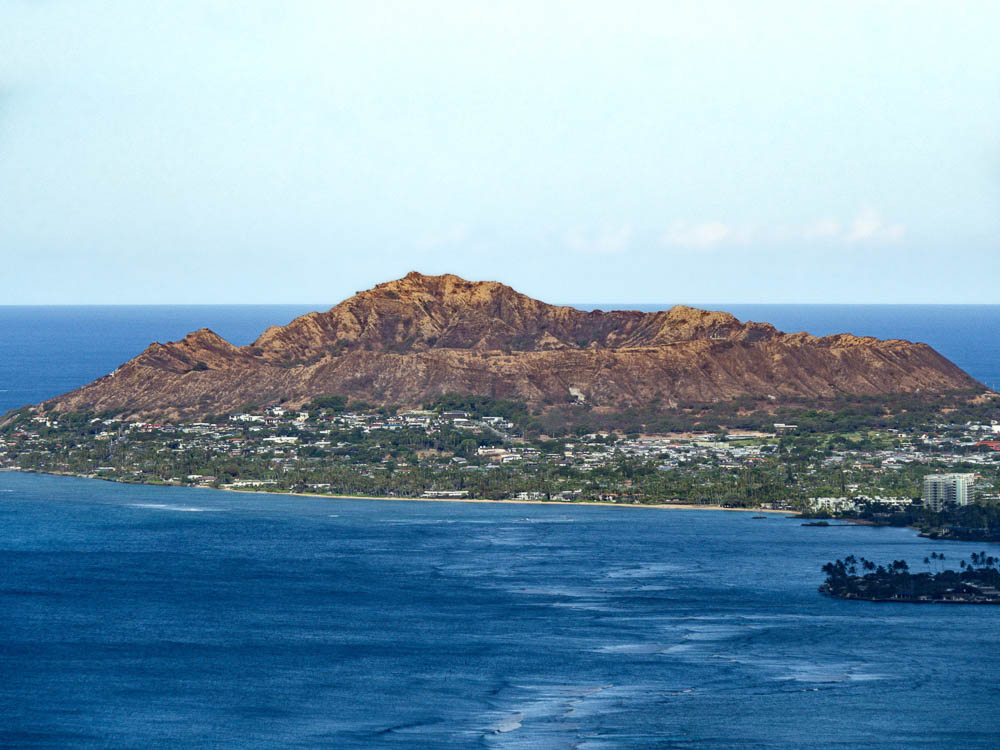
- Diamond Head and downtown Waikiki
- Hanauma Bay (Oahu’s most famous snorkeling spot)
- Inside the Koko Head Crater
- All the way back towards the Makapu’u Point Lighthouse
- And much more
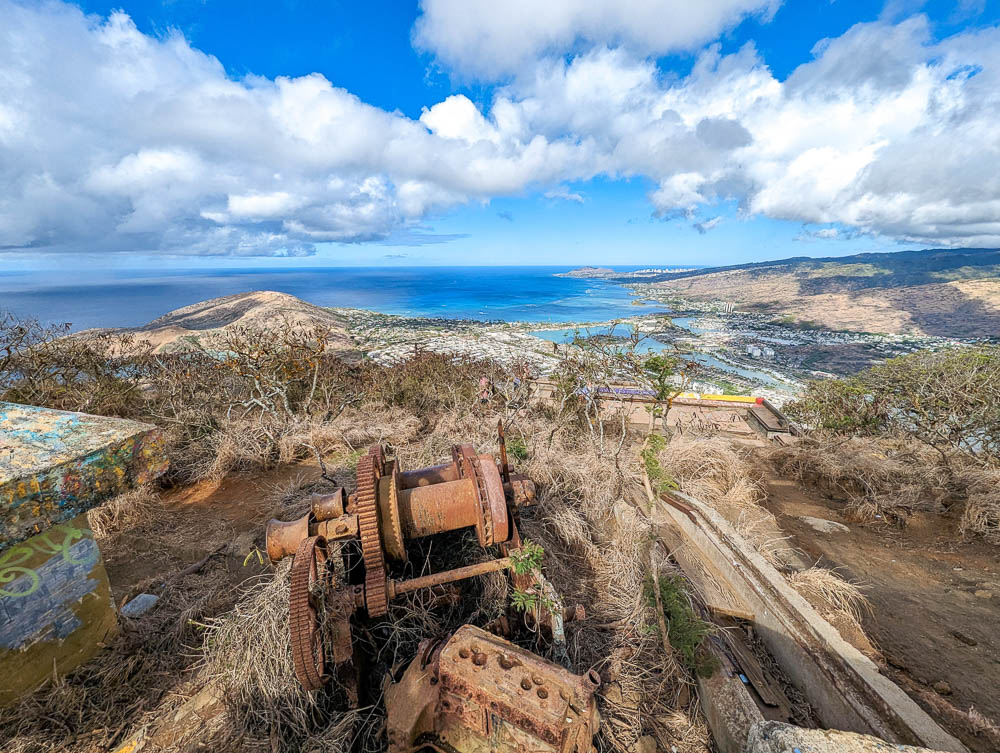
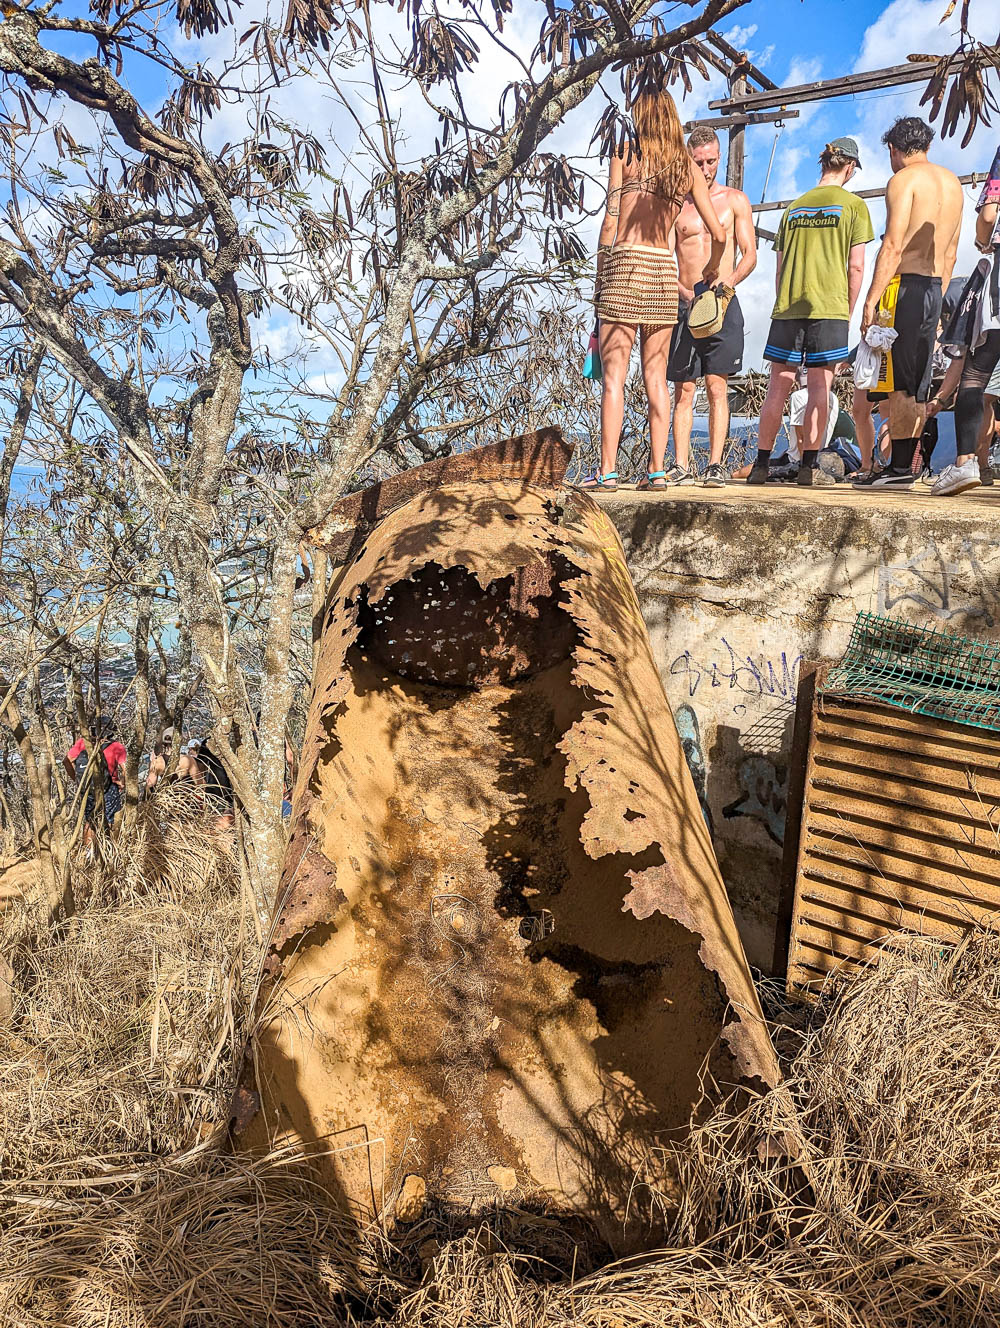
At the top you’ll also be able to check out the (rusted and abandoned) military equipment from World War II that’s still just sitting up there, strewn about. There are also several (decrepit) pillboxes to check out and take pictures on, a new viewing platform, etc.

Koko Head sunrise hike
Hiking at sunrise is a popular activity in Hawaii. I did my fair share of it while I was here too, but I saved this one for just a little bit later. Since Koko Head Crater is on the eastern part of the island, this would also make a great sunrise hike. Plus you get the added benefit of completing it before the sun and heat become too brutal. Here’s what you need to keep in mind if you plan on hiking the Koko Head railway for sunrise:
To do the Koko Head Crater hike at sunrise, you’ll have to start the hike between 4-5am if you want to be at the top at the right time, though your start time will depend on exactly when you visit. (You can check the sunrise time during your visit on this website.)
This hike is already dangerous in full sunlight, so keep in mind that doing it in pitch darkness is only going to add to your risk.
Going early won’t do much to cut down on crowds, so prepare for there to still be tons of people at the top when you get there. All the “best spots” from which to see the sunrise might already be taken.
Koko Head District Park opens at 4:00am, so if you go before that you may not be able to drive in and park.
Other great Oahu sunrise hikes
If you want to skip Koko Head as a sunrise hike, some other popular sunrise hikes on Oahu are:
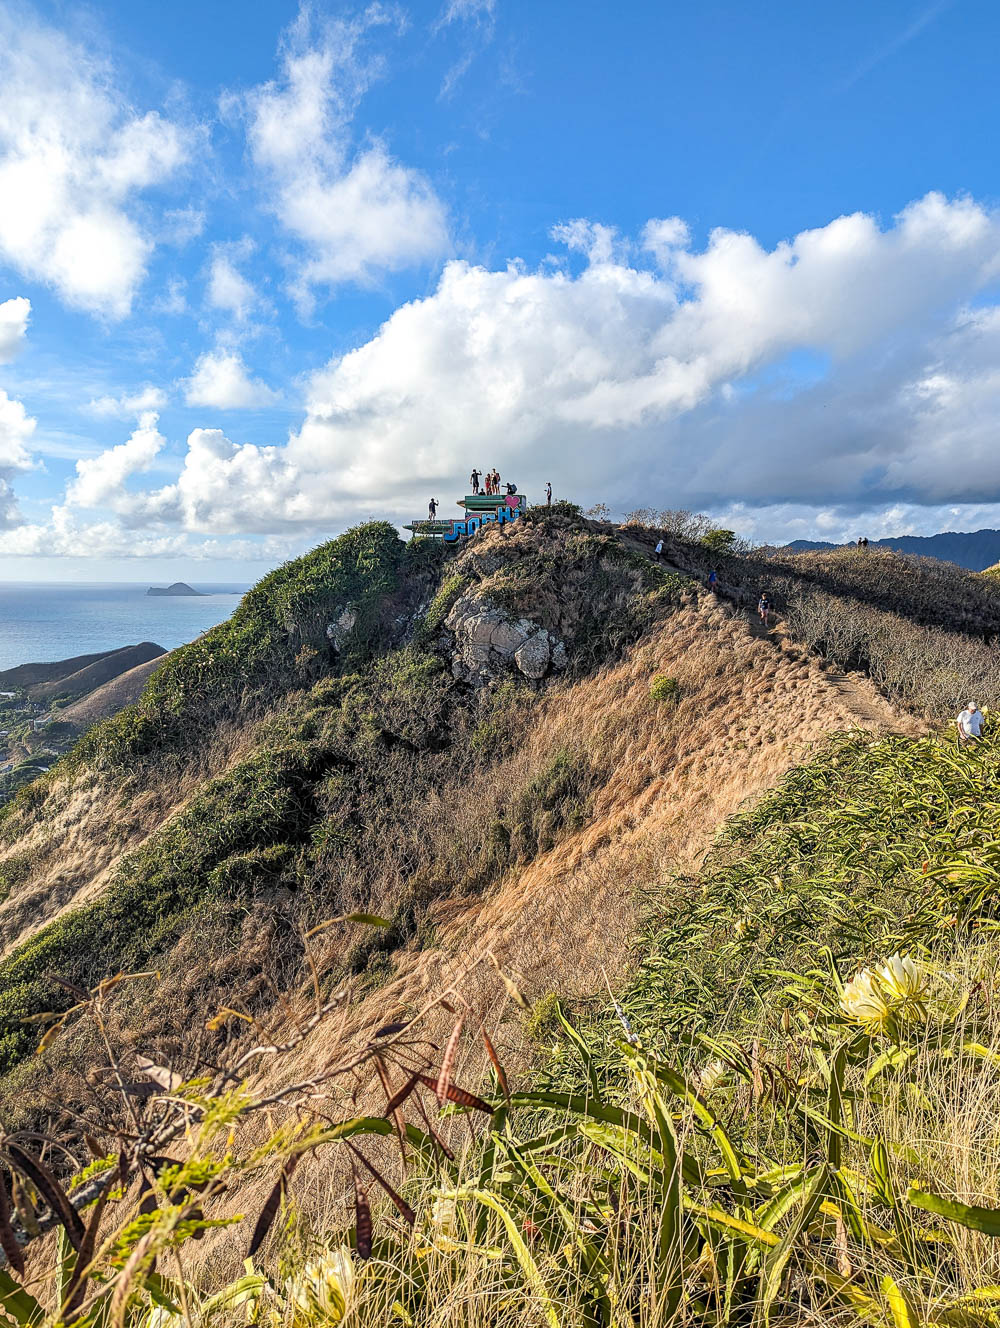
- Lanikai Pillbox hike (the most popular Oahu sunrise hike)
- Makapu’u Lighthouse trail (my vote for least-stressful sunrise hike)
- Crouching Lion hike (which I will be doing on my next visit)

Koko Head Crater hike reservations
You do not need a reservation to hike the Koko Head stairs. (Which only add to its popularity, I’m sure.) There are some hikes in Hawaii that require reservations—most notably Diamond Head Crater—but Koko Head is not one of them. You’re free to show up and hike as you please.
Koko Head shooting range
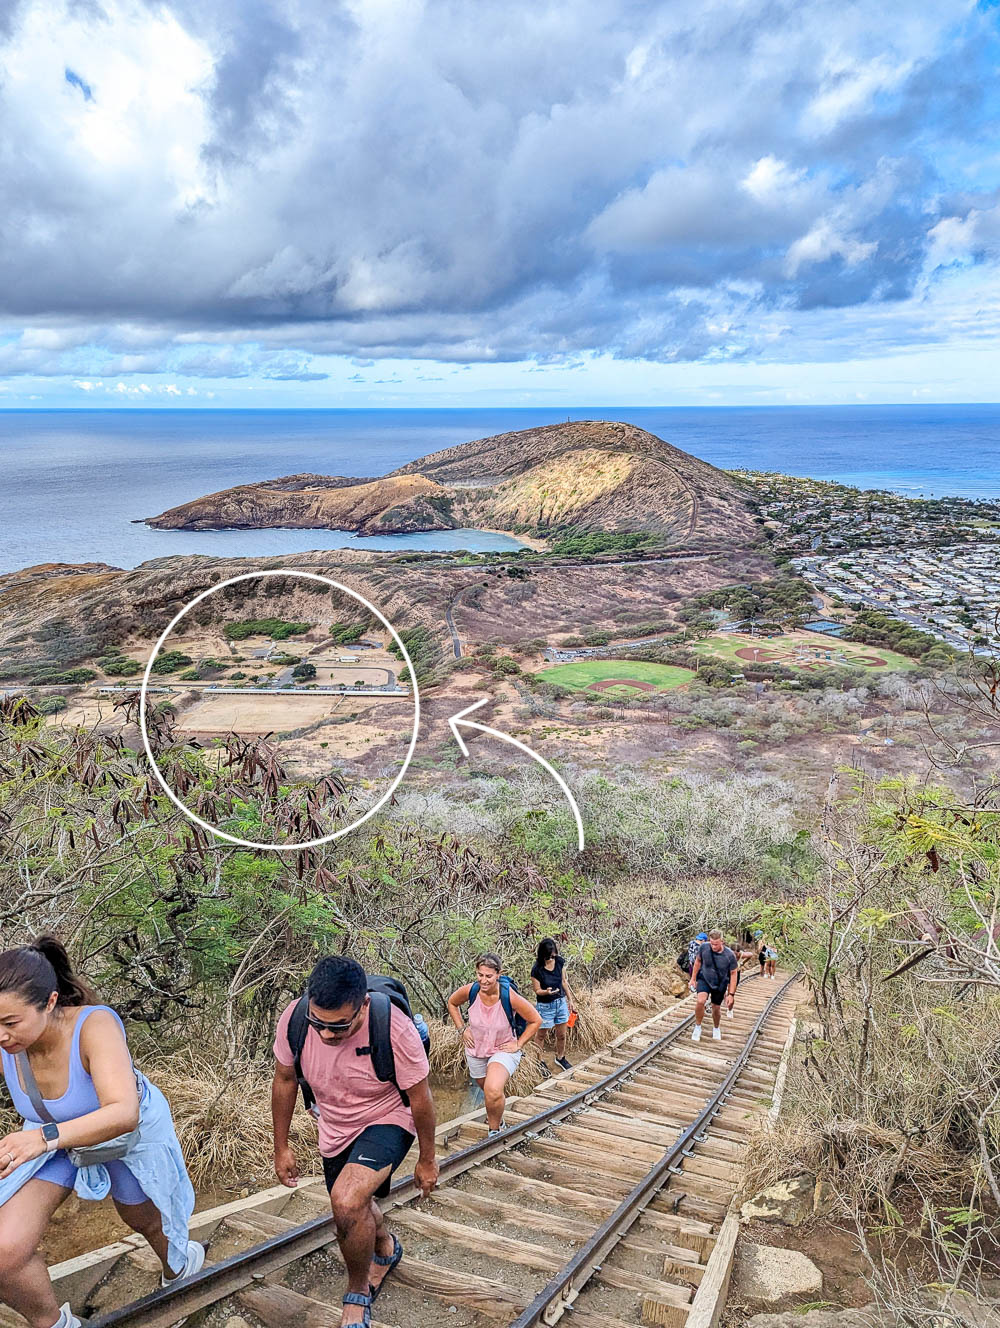
I realize this section seems totally out of place here, but once you get here you’ll understand. The whole time you’re hiking the Koko Head railway, you’ll be listening to the non-stop pop-pop-pop of gunfire. (I searched high and low for the best way to describe the sound of a shooting range using onomatopoeia and that’s what I landed on.)
At the base of the Koko Head Crater is the Koko Head Shooting Complex—Oahu’s only public gun range. It houses a pistol and gun range as well as the Honolulu Police Department’s shooting bays. There’s also a “trap and skeet” shooting range, whatever that means. So now you know.
Tips for hiking the Koko Crater railway trail
To make sure you have nothing but an awesome experience on this hike, here are some of my top tips for hiking the Koko Crater railway trail:
1. Go slow
I can’t stress this enough—do not attempt to do this hike quickly. It’s too hot out, the terrain is too precarious, and there are too many people. You will immediately exhaust and/or injure yourself. This is not a race so just relax and take your sweet-ass time.
2. Pack light
What’s harder than climbing 1,000 vertical feet in scorching heat? Doing it with a heavy bag on! The Koko Head hike isn’t super long so you won’t need to bring a lot of stuff with you. Keeping your bag as light as possible will drastically reduce the strain. (Like maybe don’t pack the world’s largest corgi in your bag?)
3. Watch your footing
Another reason to go slow on this trail is so you can pay attention to your footing. There are endless tripping hazards on this trail so you need to pay attention! Especially on the way down.
4. Make way for faster hikers
Even though most people will be taking it slow on this trail, you’ll still encounter the crazies running up the mountain with weights. Be prepared to “pull over” and let faster hikers go by. This is a super popular and crowded trail but it’s also super narrow so there’s only so much room to pass people. There’s also very little room to move out of the way, so you have to pay attention.

5. Take the bypass
If you want to see what the death-defying tramline bridge is all about, that’s on you. Otherwise, just go ahead and take the bypass around it to be safe. This hike should be fun, not the reason you have to ride in a helicopter for the first time in your life.
6. Stay hydrated
Probably the most critical of all Koko Head hiking tips is to stay mega hydrated. I can’t even express to you how hot and humid it’s going to be during your hike. You need to hydrate, before, during, and after this hike. Seriously, most of the hikers airlifted from here are epically dehydrated.
7. Wear the right stuff
Another critical tip is to wear the right stuff. By that I mean:
- Light clothing (preferably the moisture-wicking kind)
- Legit hiking shoes (not flip-flops)
- A hat
- Sunscreen
8. Go down the mountain sideways
By that I mean, sidestepping your way down the mountain will absolutely save your knees (and maybe even your face). This will allow your larger muscle groups to absorb more of the shock which will take loads of pressure off your knees. (And there’s less of a chance of just flying face first down the trail.)
9. Maybe get your tetanus shot first?
If it’s been more than 10 years since your last tetanus shot, it really wouldn’t be a bad idea to get a booster before you attempt this hike. (I’m only half joking.)
Besides the rusty old railroad tracks, there are rusted old pieces of scrap metal all over this place. There are about a hundred ways to hurt yourself here. (And FYI, you don’t need to “step on a rusty nail” to get tetanus.)
10. How to unwind after your hike
Lastly, my favorite pro-tip of them all: relax after your hike with local beers at Kona Brewing Company. The Kona taproom is just a 5-minute drive from the Koko Head parking lot. From your waterside table on the patio you can actually see the entire Koko Head Crater trail and all the poor unfortunate souls still trudging up and down the mountain. It’s glorious.
Kona Brewing Company – Hawaii Kai: 7192 Kalaniana’ole Highway, Honolulu


What to pack for hiking the Koko Crater railway trail
When prepping for your trip to Hawaii, be sure to pack the following items for your Koko Head Crater hike:
- Light clothing – Thin, moisture-wicking clothing is best for this kind of activity
- Good hiking shoes – For this hike I wore my Merrell hiking shoes (also available at REI and Amazon), but as long as you have a pair of good, actual hiking shoes or boots, you’re good.
- A hat – The sun, y’all. The struggle is real. Wear a hat of some kind – a sun hat, a baseball cap, whatever. (I can’t believe I left mine in the car.)
- A towel – A small gym towel is 100% necessary for dealing with all the sweat.
- Hiking poles – If you think you’ll benefit from hiking poles here, bring them! I saw many people with them, and honestly it’s not a bad idea. This is kind of the ideal hike for them. They don’t have to expensive; something around $20 for a pair is perfectly fine.
- Knee brace(s) – If you have knee trouble, don’t forget to pack your knee braces! You might not have knees anymore after this hike anyway.
- Sunscreen – Slather on before your hike, take it with you and apply throughout. So. Much. Sun. (Remember to keep it reef-safe to comply with Hawaii’s sunscreen laws. I use Badger.)
- Water bottle – Something big. Like this 48oz. Nalgene (or 2 of them). Or better yet, pack a water bladder in your bag. (I use this 2-liter one from Platypus.)
- Liquid IV – Also consider enhancing your water with some extra electrolytes. I always use Liquid IV for this and pack them for all my trips. (Acai Berry is my favorite flavor.)
- Super light hiking daypack – I bring my super light REI Flash 18 pack on all my trips!
- Fitbit – So you can track your own Koko Head stats. I use the Fitbit Versa.
- Small first-aid kit – Because there are so many ways to hurt yourself here. These travel-sized kits are small enough to hike with and have the stuff you’ll need on the spot.
Koko Head Crater hike FAQs
And if you skipped directly to this section, here’s the information above in a brief question and answer format.
How many steps are on the Koko Head railway trail? You’ll climb up and down 1,048 steps on this hike.
How hard is the Koko Head hike? That depends on who you ask. Technically it’s easy (it’s just climbing stairs); but physically it’s pretty demanding.
How long is the Koko Head Crater hike? The hike is about 1.5 miles roundtrip and average time needed to complete it is around 2 hours.
Is there parking at the Koko Head Crater trailhead? Yes, there are two FREE parking lots—one small, one big, both with accessible parking spots.
Are there restrooms on the Koko Head Crater hike? Yes, but only at the bottom. The small restroom building is located right next to the small parking lot. (See the map at the top of this post.)
What are the Koko Head Crater hike hours? Koko Head District Park, where the trailhead is located, is open daily from 4:00am to 11:00pm. Get more information here.
Do you need a reservation to hike Koko Head? No reservations are needed for this hike.
What’s that sound I keep hearing on the Koko Head Crater hike? At the base of the mountain is the Koko Head Shooting Complex, a public shooting range.
Is the Koko Crater trail worth it? Absolutely! It’s tough going but such a cool and unique experience and so rewarding.

Is the Koko Crater trail the same thing as the “Stairway to Heaven?” No. The so-called Stairway to Heaven (aka the Haiku Stairs) is an infinitely more dangerous and illegal hike. I would never, ever encourage you to hike this. People literally die here all the time. The Koko Head stairs are something totally different.
What’s the best time to do the Koko Head hike? As early in the morning as you can swing it would be my vote. Get it done before the sun comes out in full force; you’ll thank me!
How steep is the Koko Head trail? It varies, but expect slope grades between 30-50 degrees. (In other words, pretty much straight up.)
More info for your Koko Head Crater hike
- Hotels: Read reviews and book your Hawaii hotel room here on Booking.com (Expedia and Hotels.com usually have good deals too.)
- Rental car: Check out the best rental car deals in Honolulu here.
- Sightseeing: Pick up your Oahu GoCity pass to potentially save tons of money while you’re here.
- Local tours and activities: Check out the many options on Viator and Get Your Guide.
- Trip planning: Don’t forget to pick up a Hawaii guidebook for the rest of your trip and this pocket size USA customs and culture guide if you’re coming to us from abroad.
Have your own questions about hiking the Koko Head Crater railway trail? Ask them below in the comments! (Someone else probably has the same questions.) Happy trails, crazy hiker friend!

Save this info, pin these images:
